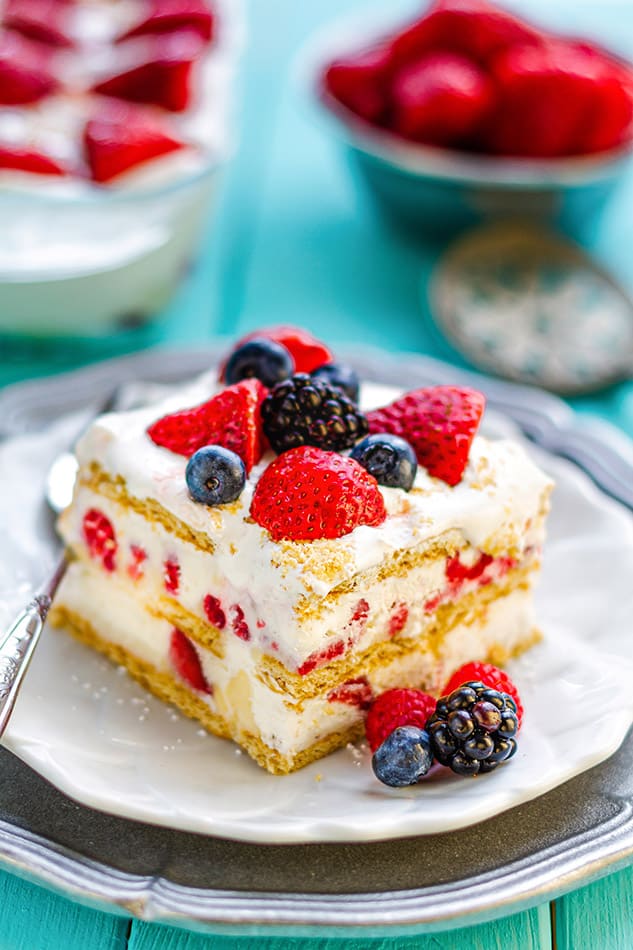
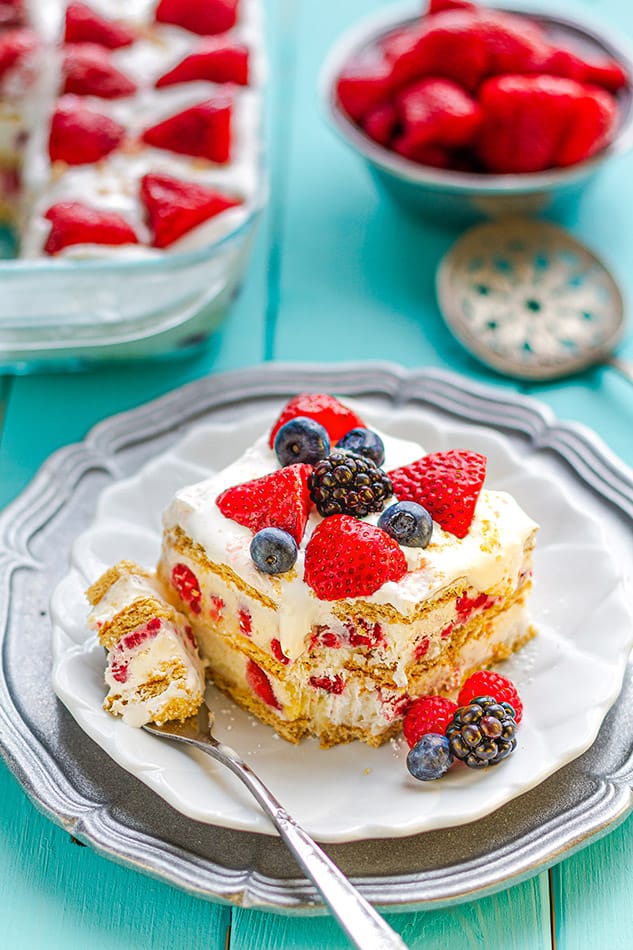
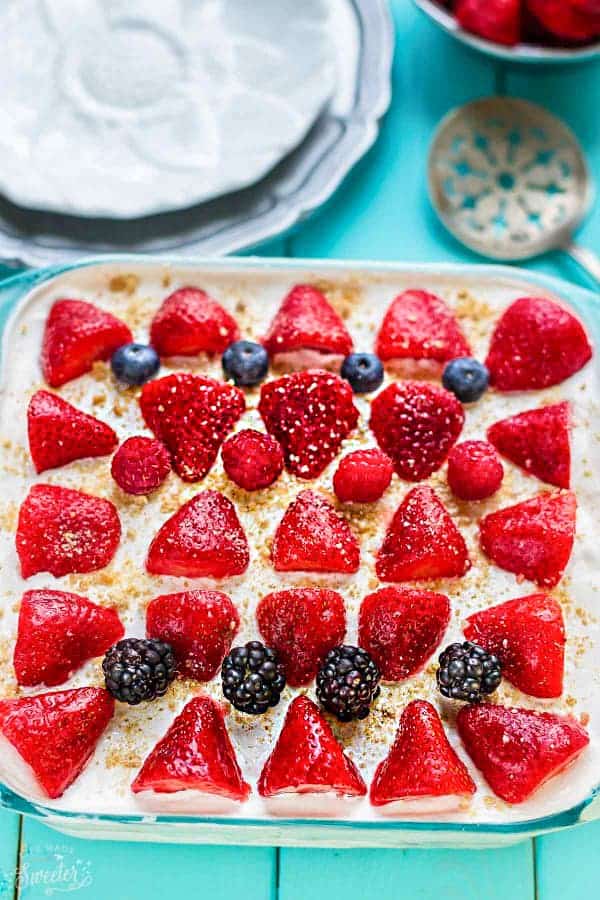
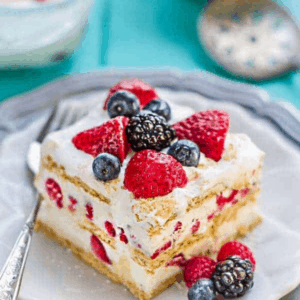
This Icebox Cake is a classic no bake cake made with layers of grain-free cookies or graham crackers, coconut whipped cream and mixed berries. It’s easy to make and the perfect summer treat that is guaranteed to impress. Gluten-free, grain-free, dairy-free, vegan, paleo with low carb + keto options.
Easy Ice Box Cake recipe
Indulge in the ultimate summer dessert with our delightful No-Bake Icebox Cake. Packed with juicy mixed berries, a creamy filling, and layers of graham crackers, this refreshing treat is perfect for those hot summer days. Whether you’re hosting a backyard barbecue or craving a cool dessert, this easy-to-make recipe is sure to satisfy your sweet tooth.
Icebox cakes are one of the easiest desserts and always such a crowd-pleaser. They are perfect for spring or summer birthday parties, cook-outs, potlucks, picnics and family barbecues. Anytime we bring this no bake cake, it’s guaranteed to be a hit with never any leftovers. And with the red, white and blue colors, it makes a patriotic choice for Canada Day, Memorial Day or Fourth 4th of July celebration or party! Plus, it’s also gluten-free, dairy-free, paleo, refined sugar-free with low carb and keto options. Get ready to impress your guests with this irresistible icebox cake that requires no baking!
Looking for more healthy icebox cake recipes? We also love this Strawberry Icebox Cake, S’mores Icebox Cake, Chocolate Icebox cake and Cherry Icebox Cake!
What is an Icebox Cake
An icebox cake is a type of dessert that is typically made by layering cookies, chocolate wafers or crackers with whipped cream or pudding and then refrigerating it until the cookies soften and the flavors meld together. The dessert gets its name from the traditional method of setting it in an “icebox” (freezr) or refrigerator to set up.
After a few hours, you get a no bake cake that tastes sort of like a delicious ice cream cake.
Ingredients you need
Old fashioned icebox cakes are made with graham crackers or wafers, heavy cream, cream cheese, sugar and sometimes pudding. For this healthy icebox cake recipe, we’re going to use:
- Gluten-free cookies: We like Simple Mills Grain-Free Honey Cinnamon Sweet Thins, Simple Mills Crunchy Cinnamon Cookies or Hu’s Kitchen Grain-Free Snickerdoodles to keep this recipe grain-free, vegan and paleo-friendly. For a low carb / keto version, use High Key Snickerdoodles or my keto shortbread cookie recipe. You can also use regular or gluten-free graham crackers if not paleo.
- Chilled Canned Coconut cream:Whipped until stiff peaks. Be sure to chill the entire cans of coconut cream overnight before using. Works best with brands only containing coconut with no other fillers – etc. Trader Joe’s, Aroy-D, Savoy or Nature’s Charm. For easier prep you can sub with coconut whipped topping such as So Delicious Coco Whip. If not dairy-free, you can sub with regular heavy cream, heavy whipping cream or regular whipped topping of choice.
- Powdered maple sugar or powdered coconut sugar: Helps to sweeten things up and stabilize the whipped cream. For a low carb / keto version, use powdered sweetener such as powdered Lakanto powdered monkfruit sweetener, erythritol or SWERVE. You can also use this powdered organic icing sugar or your favorite brand.
- Pure vanilla extract: Optional but adds extra delicious flavor.
- Mixed berries: This recipe uses strawberries, blackberries, raspberries and blueberries
How to make an Icebox Cake
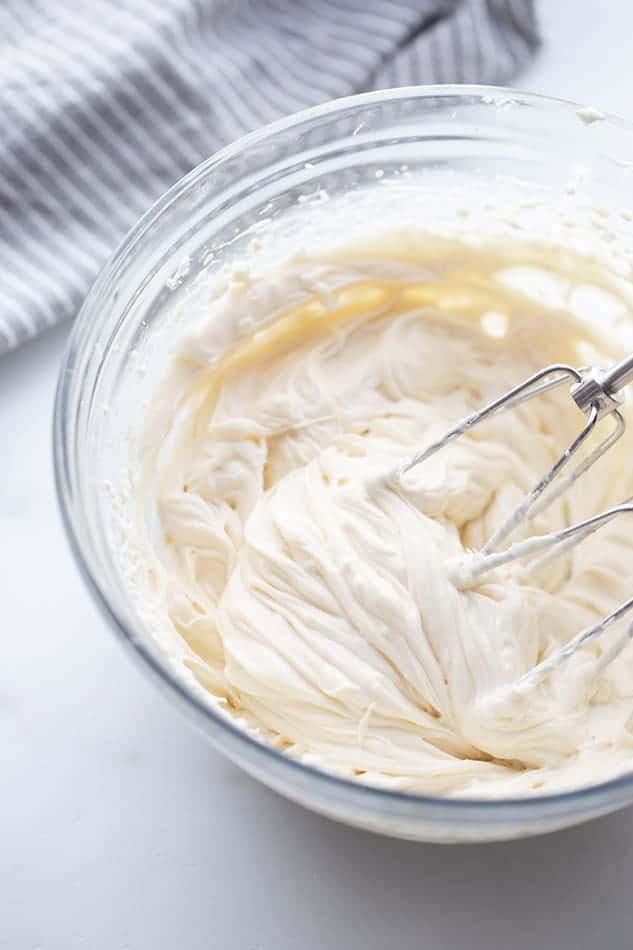
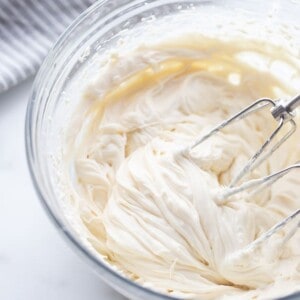
- Make the whipped cream: With a hand mixer or in the bowl of a stand mixer, whip chilled coconut cream until it just holds soft peaks. Add powdered sugar and whip to combine until stiff peaks hold. Set aside 1/2 cup whipped cream for topping.

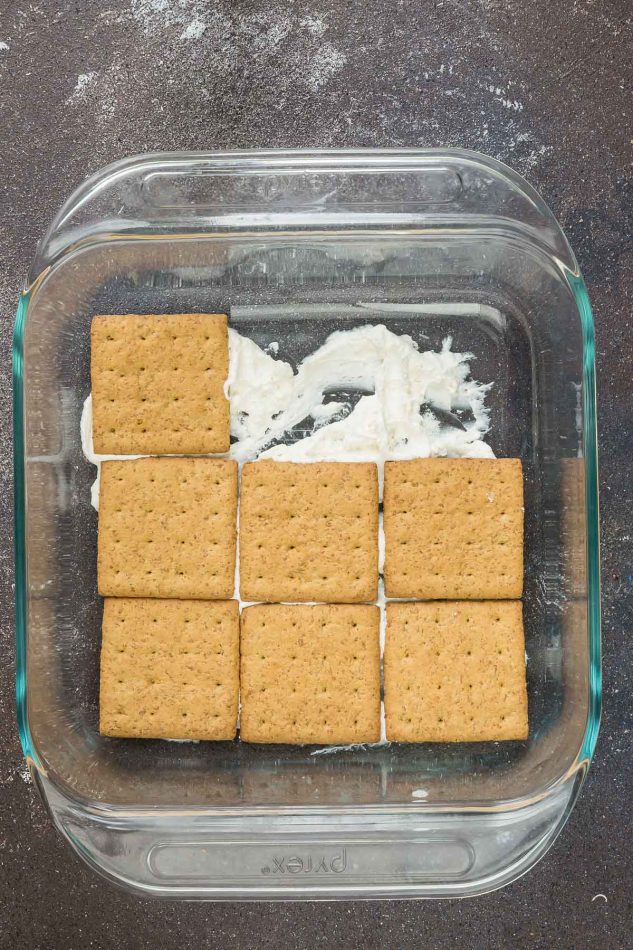
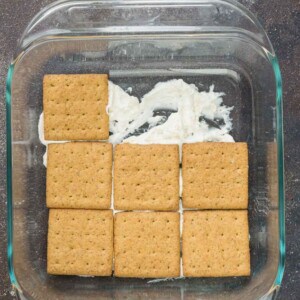
- Assemble the cake layers: Spread a thin layer of the cream mixture in an 8 x 8 pan to coat the bottom.Place a single layer of cookies / crackers across the center of the pan and then break up 1 or 2 more cookies / crackers as needed to fill in the gaps. Spread half of the cream mixture on top. Place a single layer of mixed berries. Top with another layer of cookies / crackers, breaking them as needed to make them fit. Spread the remaining cream mixture over the top. Add another layer of berries. ADD the final layer of cookies / crackers. Spread reserved cream evenly on top.

- Decorate cake: Place the last layer of the prettiest mix of berries reserved for the top. Sprinkle on crushed cookie / cracker crumbs on top.
- Chill cake in fridge: Refrigerate for at least 4 hours or overnight until the cookies / crackers have softened completely.

Tips for success
Follow these helpful tips to ensure your No-Bake Mixed Berry Icebox Cake turns out perfectly every time:
- Use Fresh, Ripe Berries: Opt for fresh, ripe berries to maximize their natural sweetness and flavor. This will elevate the overall taste of your icebox cake.
- Chill Your Mixing Bowl and Whisk: Before making the whipped cream, chill your mixing bowl and whisk in the freezer for about 15 minutes. This will help the cream whip up faster and reach the desired fluffy consistency.
- Layer Evenly: When assembling the cake, distribute the berries and cream filling evenly between each layer. This will ensure a balanced taste and texture throughout the dessert.
- Allow Proper Chilling Time: After assembling the icebox cake, refrigerate it for at least 4 hours or overnight. This allows the flavors to meld together and the graham crackers to soften, resulting in a delectably creamy and moist dessert.
- Choose a good quality brand of coconut milk: We like the one from Trader Joe’s or Aroy-D. For easier prep you can sub with coconut whipped topping such as So Delicious Coco Whip to keep things simple and omit the powdered sweetener.
- Chill the coconut cream: Be sure to chill the coconut cream overnight prior to whipping. Otherwise, the coconut cream won’t harden and will not whip up.
- Add reserved liquid from the can: If your whipped cream is too stiff or you see clumps, add some of the reserved liquid from the can to help it blend smoother.
Storage and freezer instructions
If you have any leftovers or want to prepare the icebox cake in advance, here’s what you need to know about storing and freezing:
- Refrigerating: Cover the cake tightly with plastic wrap or place it in an airtight container. It can be stored in the refrigerator for up to 3 days, but keep in mind that the texture may become slightly softer over time.
- For make ahead: Simply assemble in advance and store covered in the fridge overnight
- Freezing: To freeze the icebox cake, wrap it securely with plastic wrap and place it in the freezer. It can be frozen for up to 2 months. Before serving, transfer it to the refrigerator and allow it to thaw for several hours until it reaches the desired consistency.
What to Serve with Your Icebox Cake:
To complete your No-Bake Mixed Berry Icebox Cake experience, consider serving it with the following accompaniments:
- Whipped Cream: Top each slice of the icebox cake with an extra dollop of whipped cream. It adds a luxurious touch and complements the creamy texture of the cake.
- Fresh Berries: Garnish your serving plates with a handful of fresh berries. This not only adds visual appeal but also enhances the fruity flavors of the icebox cake.
- Mint Leaves: A sprig of fresh mint adds a pop of color and a refreshing aroma to the dessert. It also provides a lovely contrast to the sweetness of the cake.
- Raspberry Sauce: Drizzle a homemade raspberry sauce over each slice of the icebox cake for an extra burst of berry goodness. It creates a beautiful presentation and intensifies the berry flavors.
Remember, these serving suggestions are just the beginning. Feel free to experiment with different toppings and accompaniments to suit your personal preferences and make your dessert truly unique.
Variations to Elevate Your Icebox Cake:
If you’re feeling adventurous or want to customize your No-Bake Mixed Berry Icebox Cake, here are a few variations to consider:
- Chocolate Lover’s Delight: Add a decadent twist to your icebox cake by incorporating chocolate. Layer chocolate graham crackers between the berry and cream cheese filling for a rich and indulgent experience. You can also sprinkle chocolate shavings on top for an extra touch of elegance.
- Tropical Paradise: Give your icebox cake a tropical twist by using tropical fruits such as mangoes, pineapples, and kiwis. The combination of tangy tropical flavors with the creamy filling will transport you to a sunny beach getaway.
- Lemon Berry Bliss: Introduce a burst of citrusy freshness by incorporating lemon zest into the cream cheese filling. Pair it with a mix of fresh berries for a delightful balance of tart and sweet flavors. Garnish with lemon slices for an eye-catching presentation.
- Nutty Delight: For a delightful crunch and nutty flavor, layer toasted almonds, pecans, or crushed pistachios between the layers of graham crackers and filling. The added texture will create a delightful contrast to the creamy components of the cake.
- For a low carb keto icebox cake: use High Key Snickerdoodles or my keto shortbread cookie recipe. Swap powdered sugar for powdered monk fruit sweetener
- For gluten-free ice box cake: use any gluten free graham crackers, cookies or my gluten free sugar cookie recipe or keto lemon cookie recipe
- For an old-fashioned icebox cake: You can use Vanilla Oreo cookies, chocolate or vanilla wafer cookies
- Add more toppings: Add in some chopped nuts, a drizzle of chocolate or whatever you have on hand!
More easy no bake cakes:

This Icebox Cake is a classic no bake cake made with layers of grain-free cookies or graham crackers, coconut whipped cream and mixed berries. It's easy to make and the perfect summer treat that is guaranteed to impress. Gluten-free, grain-free, dairy-free, vegan, paleo with low carb + keto options.
- 3 cups chilled canned coconut cream (two 13.5 oz cans) , be sure to chill the entire cans of coconut cream overnight before using. Works best with brands only containing coconut with no other fillers - etc. Trader Joe's, Aroy-D, Savoy or Nature's Charm. For easier prep you can sub with coconut whipped topping such as So Delicious Coco Whip. If not dairy-free, you can sub with regular heavy cream, heavy whipping cream or regular whipped topping of choice.
- 1/3 cup powdered sweetener of choice We like powdered pure maple sugar or powdered coconut sugar. For a low carb / keto version, use powdered sweetener such as powdered Lakanto powdered monkfruit sweetener, erythritol or SWERVE. You can also use any powdered organic icing sugar of choice.
- 1 tsp pure vanilla extract , optional but adds extra flavor
- 25-30 grain-free cookies , or more depending on the size of pan and brand of cookies you use. We like Simple Mills Grain-Free Honey Cinnamon Sweet Thins, Simple Mills Crunchy Cinnamon Cookies or Hu's Kitchen Grain-Free Snickerdoodles to keep this recipe grain-free, vegan and paleo-friendly. For a low carb / keto version, use High Key Snickerdoodles, High Key Vanilla Wafers or my keto shortbread cookie recipe. You can also use regular or gluten-free graham crackers if not paleo.
- 2 1/2 cups mixture of fresh blackberries , blueberries, raspberries and hulled and sliced strawberries, divided leaving the prettiest slices for the top
Make the whipped cream: With a hand mixer or in the bowl of a stand mixer, whip chilled coconut cream until it just holds soft peaks. Add powdered sugar (and vanilla if using) and whip to combine until stiff peaks hold. Set aside 1/2 cup whipped cream for topping.

Spread a thin layer of the cream mixture in an 8 x 8 pan to coat the bottom. Place a single layer of cookies / crackers across the center of the pan and then break up 1 or 2 more cookies / crackers as needed to fill in the gaps.

Spread half of the cream mixture on top. Place a single layer of mixed berries. Top with another layer of cookies / crackers, breaking them as needed to make them fit. Spread the remaining cream mixture over the top. Add another layer of berries. ADD the final layer of cookies / crackers. Spread reserved cream evenly on top.
Top with the final layer of cookies / crackers. Spread the reserved 1/2 cup whipped cream on top.
Place the last layer of the prettiest mix of berries reserved for the top. Sprinkle on crushed cookie / cracker crumbs on top.

Refrigerate for at least 4 hours or overnight until the cookies / crackers have softened completely.

*To make this icebox cake in a 9x13 pan, increase the amounts by 1.5
How to store: Store covered in the fridge overnight for up to 3 days.
For make ahead: Assemble in advance and store covered in the fridge overnight
How to freeze: Store covered in the freezer for up to one week. We don't recommend storing it for longer than one month though as the cookies will soften too much and crumble.
Disclaimer: This updated post was generated on May 24, 2023 by ChatGPT, an AI language model, and all info should be reviewed and validated by a human for accuracy and relevancy before implementation.

 Did you try this recipe?


arialle -
yum, this was amazing! so easy and delicious! thanks