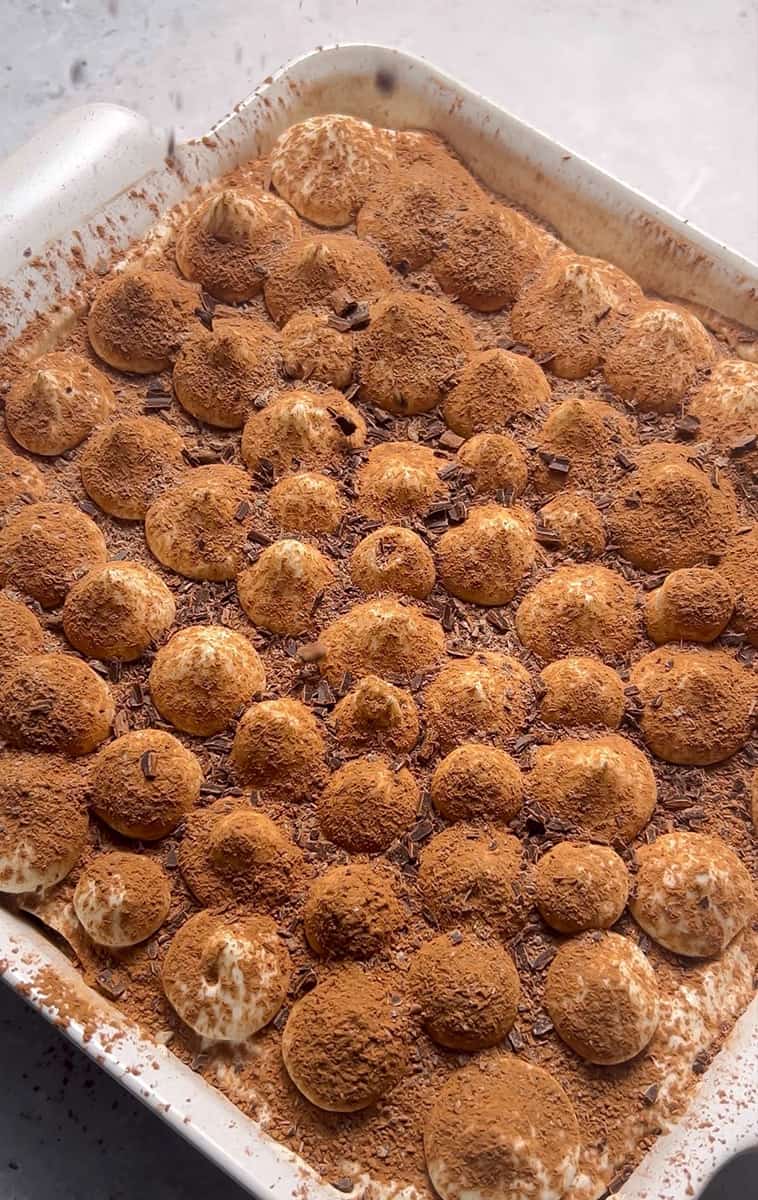
Unleash the rich symphony of flavors in this Gluten-Free Tiramisu recipe, where luscious mascarpone, velvety dairy-free whipping cream, and robust coffee converge for an irresistible dessert. Elevate your culinary repertoire with this coffee-infused delight, blending powdered sweetness, gluten-free ladyfingers, and cocoa into a decadent masterpiece.
Updated December 2023
Gluten-Free Tiramisu Recipe: Indulge in a Coffee-Infused Delight
Are you craving a luscious and creamy dessert that combines the richness of mascarpone cheese with the bold flavors of espresso? This Gluten-Free Tiramisu is a delightful treat that captures the essence of the classic Italian dessert in every bite. It’s easy to make with layers of gluten-free ladyfingers, luscious mascarpone, velvety dairy-free whipping cream, robust coffee and rich cocoa in every bite.
Whether you’re a seasoned baker or a dessert enthusiast, this gluten-free and dairy-free Tiramisu with no raw eggs promises a hassle-free journey to creating a show-stopping dessert.
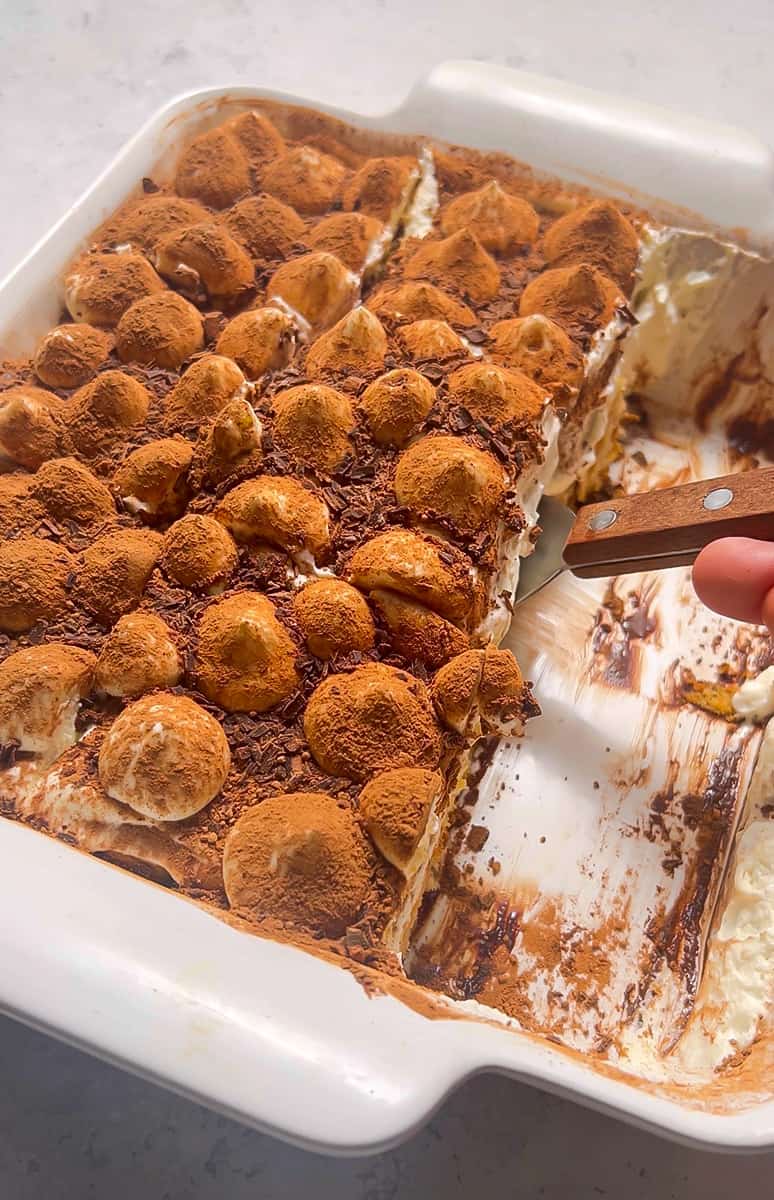
What is Tiramisu?
Tiramisu, originating in the Veneto region of Italy in the 1960s, holds a fascinating culinary history. Often associated with the city of Treviso, the dessert’s name, translating to “pick me up” in Italian, reflects its creation as a special treat in a local restaurant. With coffee-soaked ladyfingers, creamy mascarpone, and cocoa powder layers, tiramisu has evolved into an internationally acclaimed, beloved classic, embodying the essence of Italian culinary mastery, despite its somewhat elusive origins.
Ingredients: Decoding the Delicious Lineup
- Vegan Whipping Cream: This key ingredient adds a velvety texture and luxurious richness to our gluten-free tiramisu. Opt for brands such as Silk, Cha’s, Nature’s Charms or NutPods. Regular heavy whipping cream works too if you’re not dairy-free.
- Powdered Sugar: A touch of sweetness that perfectly balances the bold coffee flavors. Choose Lakanto powdered monk fruit sweetener or Swerve Confectioners for a lower sugar option.
- Schlagfix Vegan Mascarpone Cheese: The star of the show, this creamy plant-based variation of the classic Italian cheese lends a smooth and decadent. If you can’t find vegan mascarpone, you can try making your own or sub with a thick dairy-free Greek-style plain yogurt or thick coconut based yogurt (such as Kite-Hill or Cocojune). Regular mascarpone works too if you’re not dairy-free.
- Vanilla Extract: A dash of vanilla enhances the overall flavor profile, adding warmth to each layer.
- Cold Espresso or Strongly Brewed Coffee: Infusing the dessert with a robust coffee flavor, this is the essence of tiramisu.
- Alcohol (Optional): Elevate the experience with a hint of dark rum, brandy or coffee flavored liqueur such as Kahlua or DaVinci brands for an adult twist.
- Schär Gluten-free Ladyfingers: These delicate gluten-free sponge cakes provide the perfect base, soaking up the coffee goodness. You can also use regular lady fingers (one 7-ounce 200 gram Savoiardi package) if you’re not gluten-free.
- Cacao Powder or Cocoa Powder: A dusting of cocoa adds a bittersweet touch, tying together the layers.
- Shaved Dairy-free (or regular) Chocolate: A finishing touch for garnish, adding visual appeal and an extra layer of chocolatey goodness. Choose high quality dairy-free brands such as Pascha’s Chocolate, Hu’s Kitchen, Eating Evolved, Lily’s Sweets or Enjoy Life.
Instructions: How to make Gluten-Free Tiramisu
1. Whip the Creamy Base: Begin by beating together heavy whipping cream, sifted powdered sugar, and vanilla until stiff peaks form. Introduce room-temperature mascarpone, continuing to whip for a velvety consistency.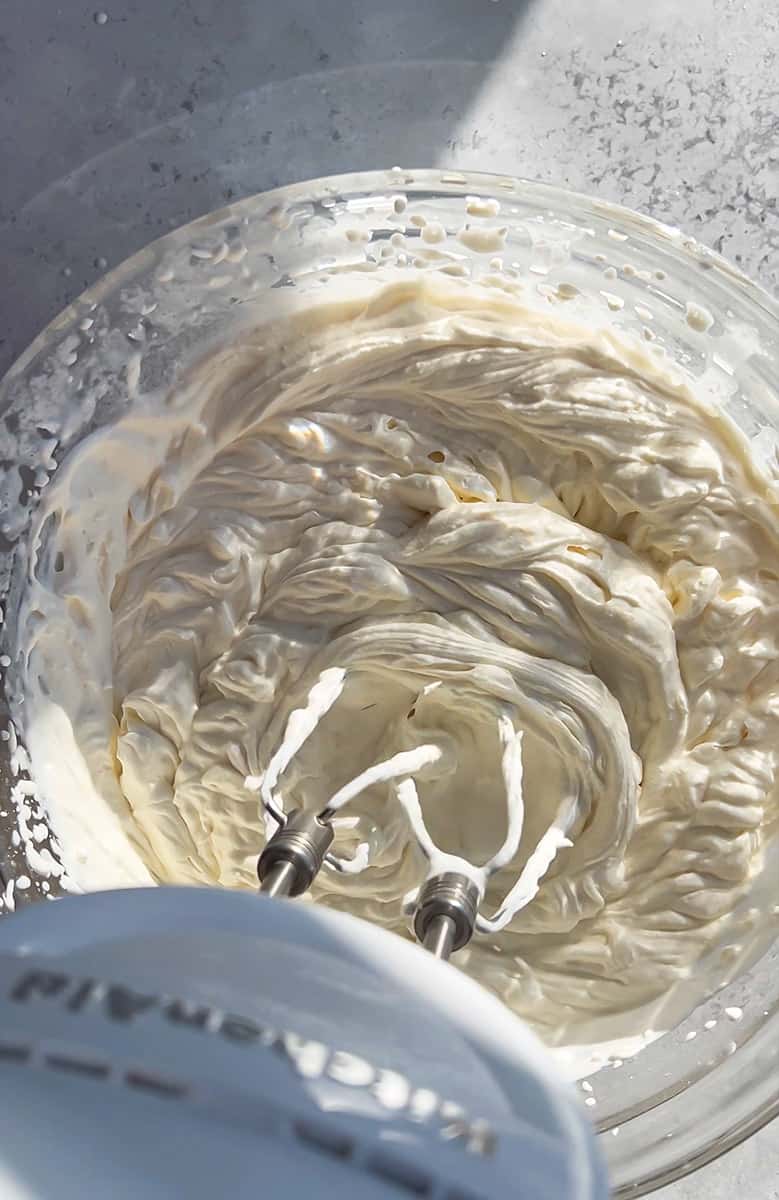
2. Prep the Baking Dish: Dust the bottom of an 8×8-inch dish with cocoa powder using a fine mesh sieve or sifter.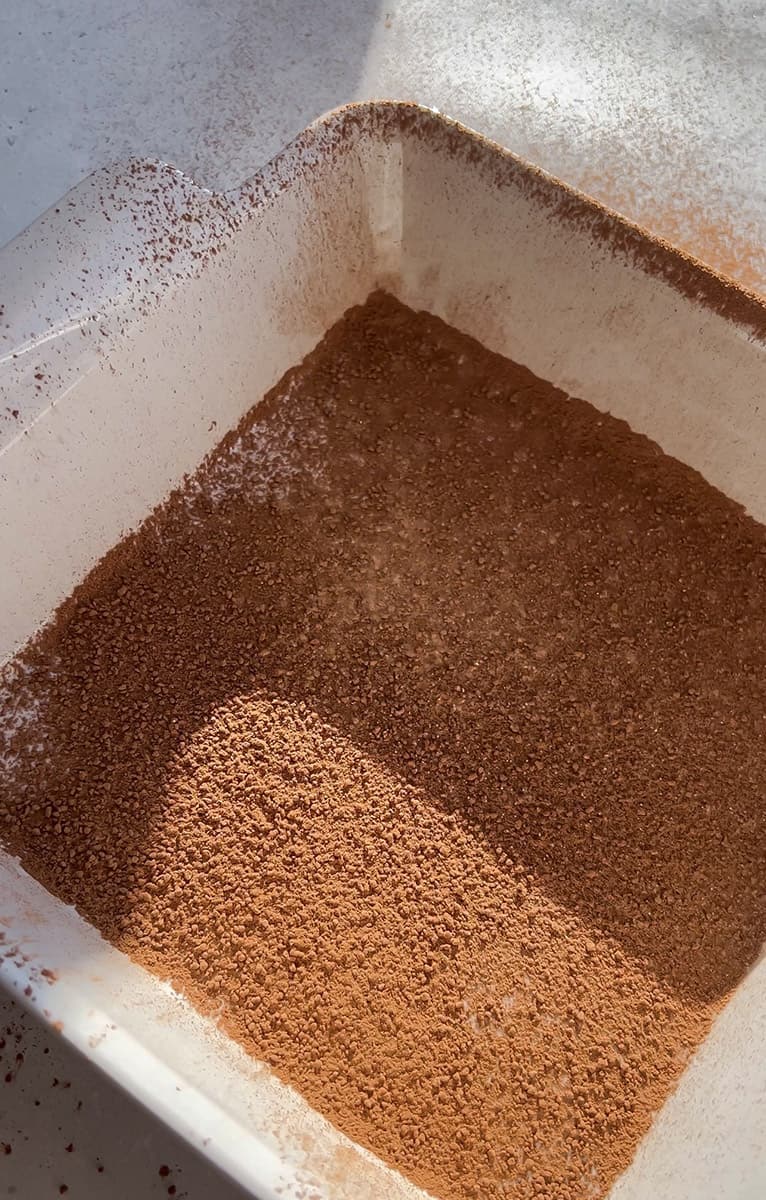
3. Ladyfinger Dunking: In a bowl of coffee and optional liqueur, quickly dunk ladyfingers to moisten without soaking.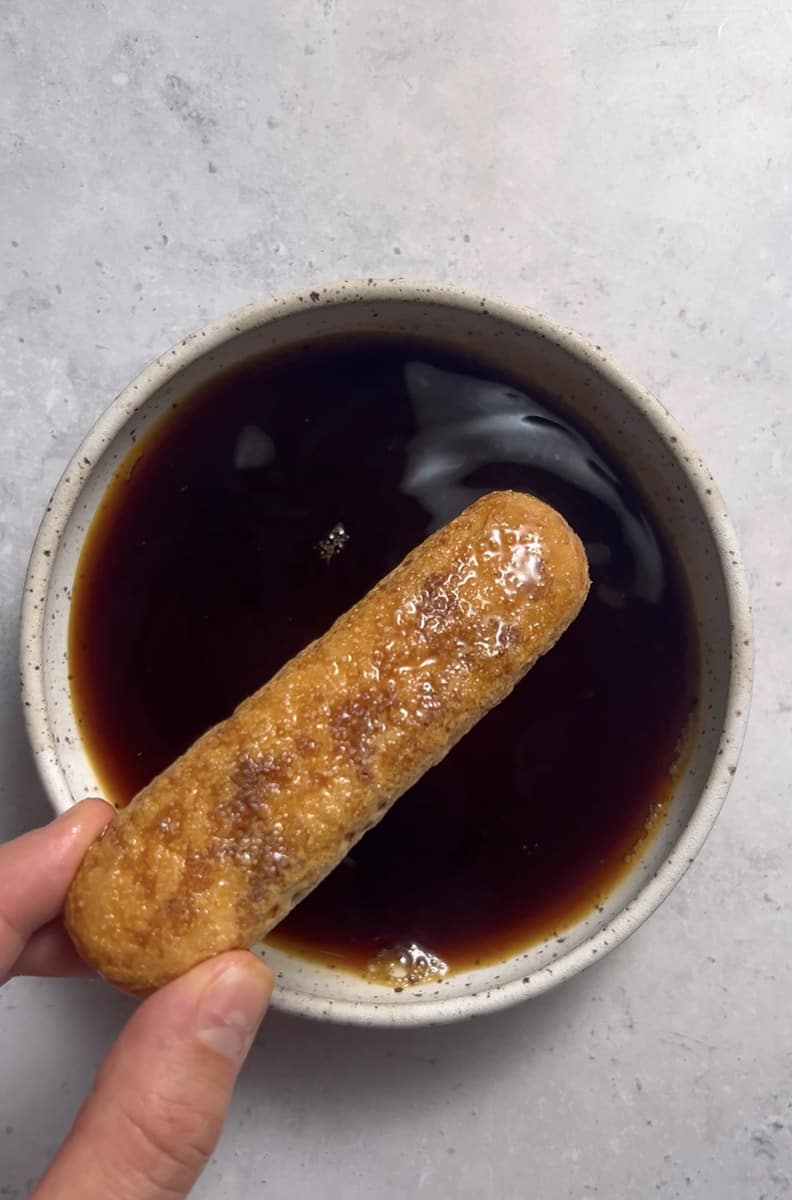
4. Layer Magic: Arrange the dunked ladyfingers in a single layer in the prepared dish.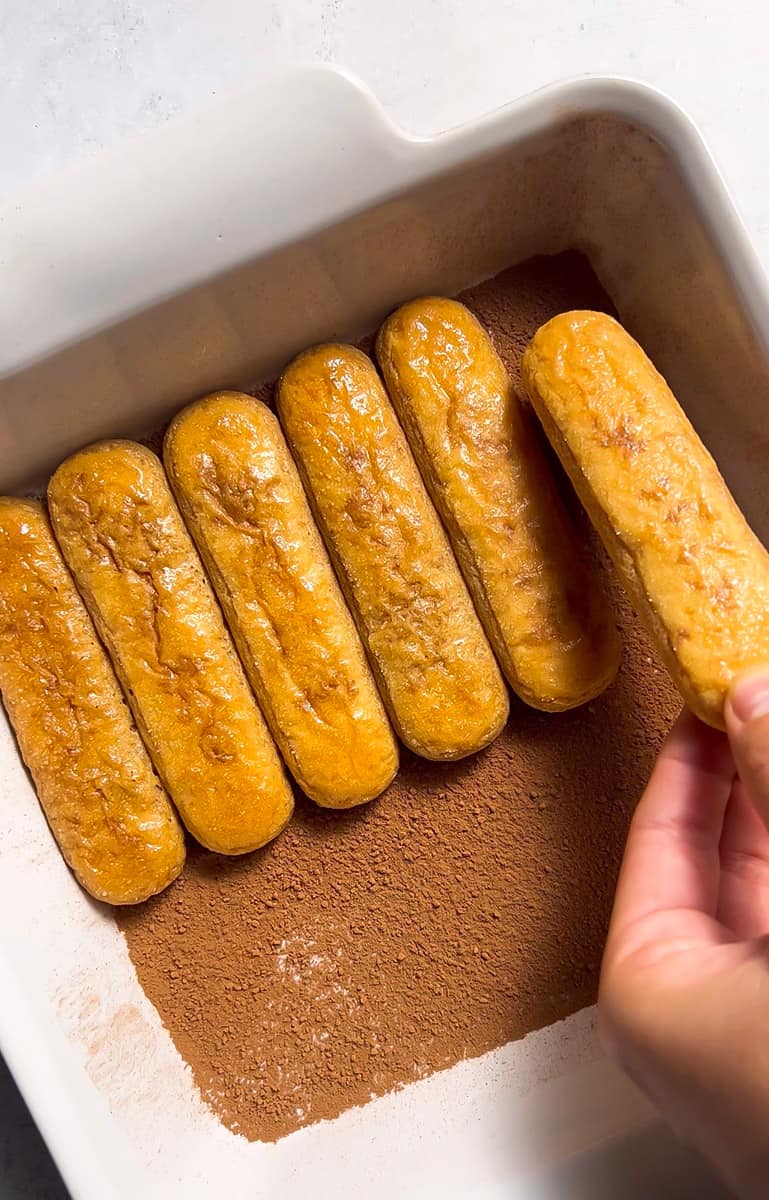
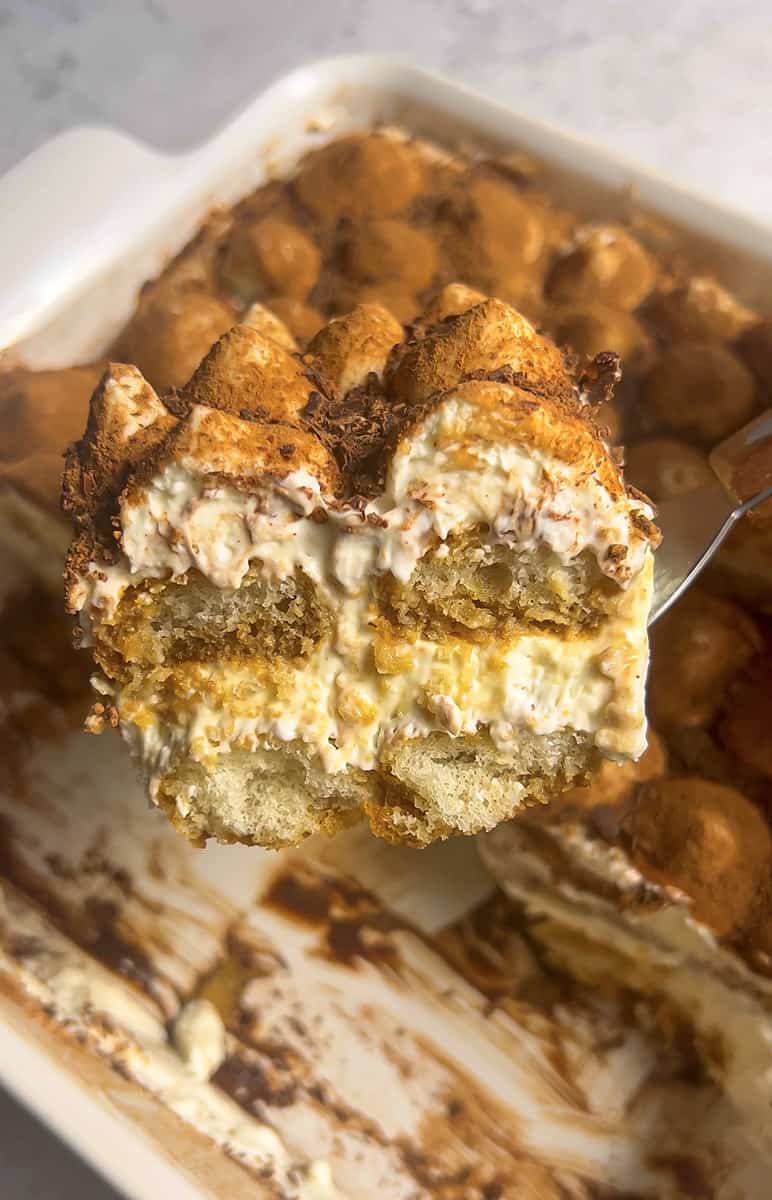
5. Mascarpone: Layer: Spread half of the whipped mascarpone mixture evenly over the ladyfingers. Repeat the ladyfinger dunking and create a second layer.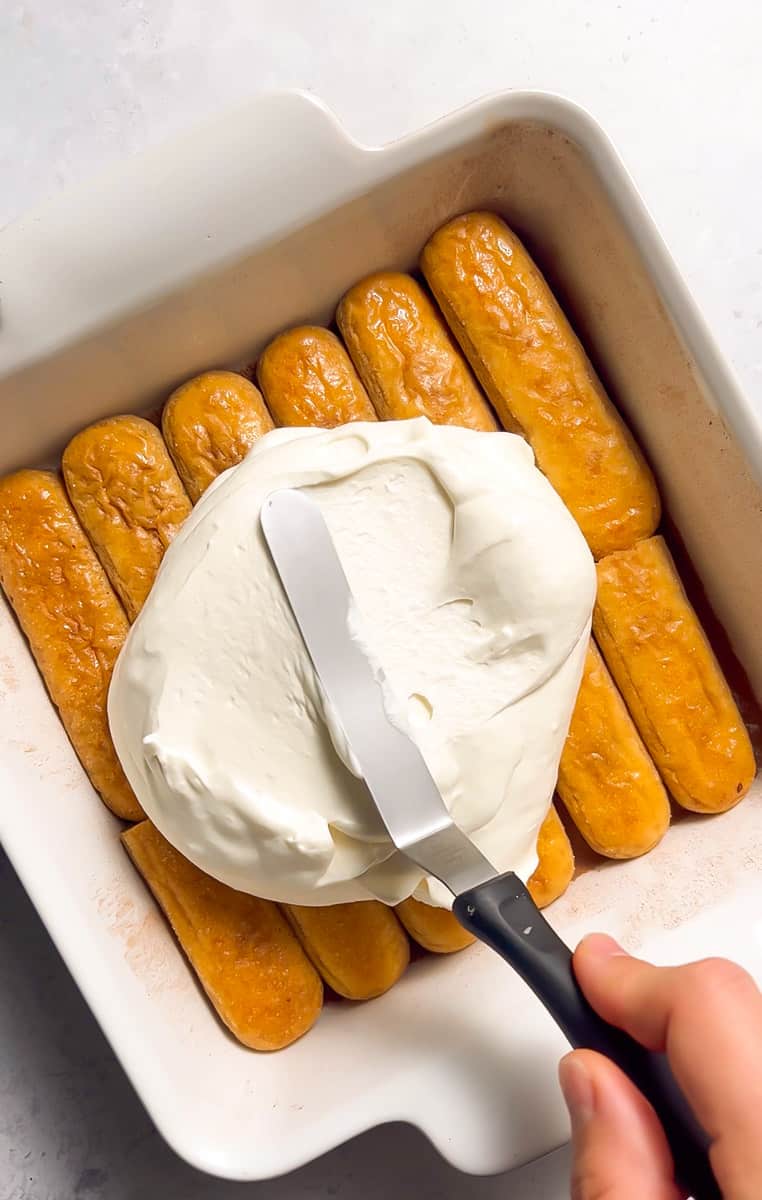
6. Final Layer: Top it off with the remaining mascarpone mixture, either piped or spread evenly.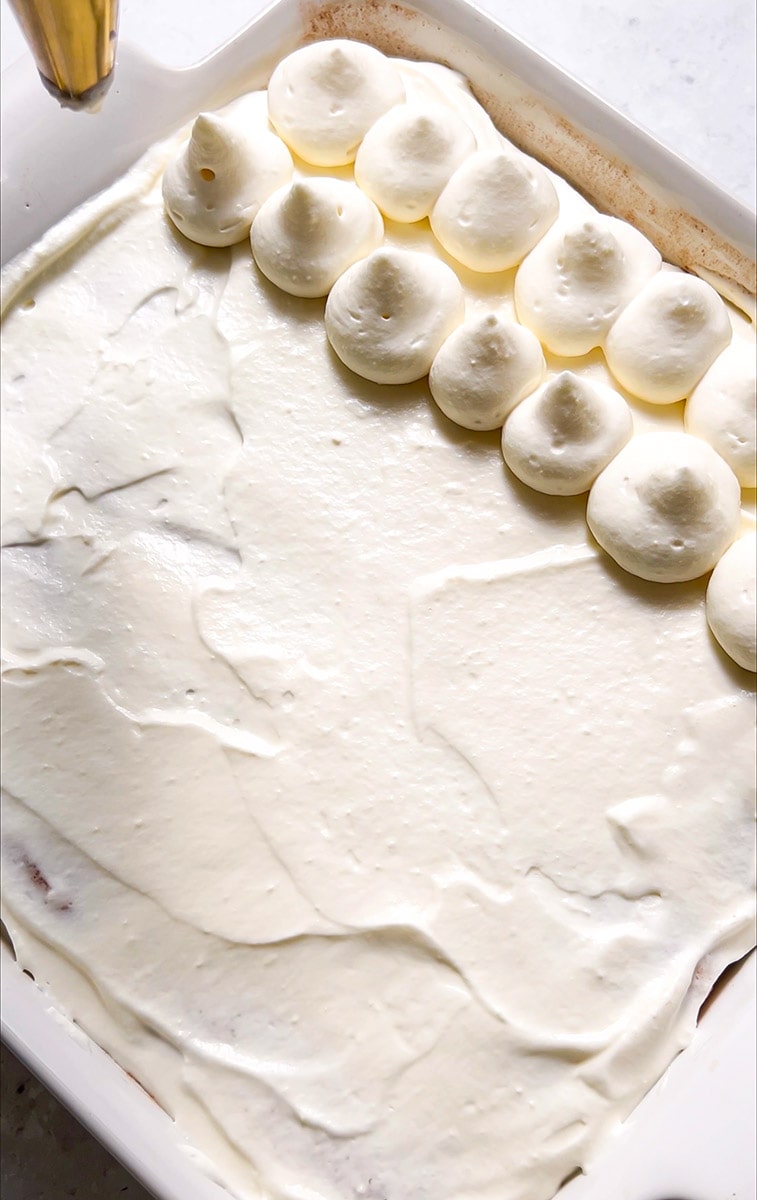
7. Chill for Perfect Set: Cover the dish and refrigerate for at least 3-4 hours or overnight until the tiramisu sets.
8. Cocoa Finale: Before serving, dust the top layer with cocoa powder using a fine mesh sieve. Sprinkle shaved chocolate and chill again for 30 minutes.
9. Slice and Serve: Cut into slices or scoop out servings for a delicious and visually stunning Tiramisu experience.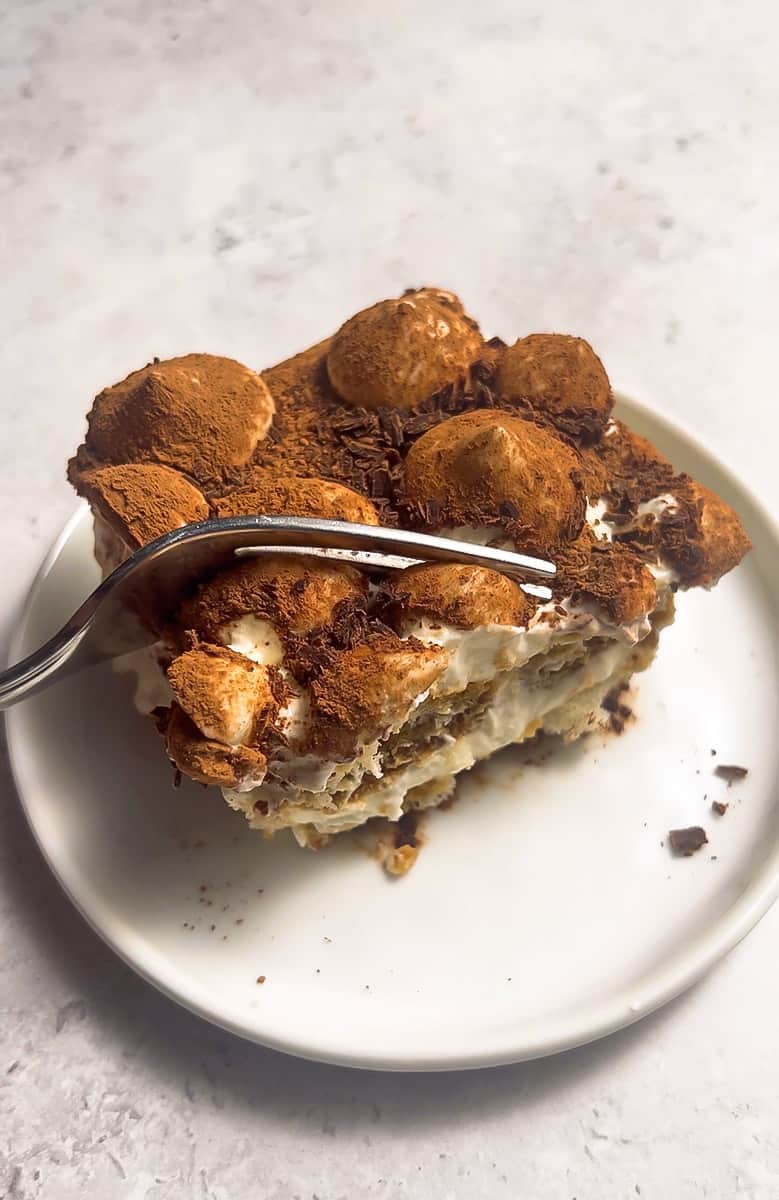
Tips for Success: Mastering the Art of Tiramisu
- Temperature Matters: Ensure your mascarpone cheese is at room temperature for a smoother incorporation into the whipped cream filling.
- Quality Coffee is Key: Choose a high-quality espresso or coffee to intensify the tiramisu’s flavor.
- Precision in Dusting: Use a fine mesh sieve for an even dusting of cocoa powder on each layer, creating a visually appealing presentation.
- Whip it Good: Achieve the perfect consistency by whipping the cream until stiff peaks form before incorporating mascarpone.
- Gentle Dunking: When moistening ladyfingers, a quick dunk ensures they absorb the coffee without falling apart.
- Layering Technique: Strategically layer ladyfingers and eggless mascarpone filling for a well-balanced and visually pleasing dessert.
- Chill to Perfection: Allow the tiramisu to set in the fridge for at least 3-4 hours or overnight for optimal flavor development.
- Slicing Techniques: For clean slices, dip a sharp knife in hot water before cutting into the chilled tiramisu.
- Creative Garnishes: Experiment with different chocolate shavings or sprinkle a touch of cinnamon for an extra layer of complexity.
- Piping Bag: For a seamless preparation process, use a piping bag to create an elegant top layer or opt for a smooth, even spread with an offset spatula.
Variations and Substitutions: Customize to Your Taste
- Spiced Twist: Infuse the coffee with a cinnamon stick or a touch of nutmeg for a warm and aromatic variation.
- Nutty Indulgence: Add a layer of finely chopped hazelnuts or toasted almonds between the ladyfingers for a delightful crunch.
- Mocha Fusion: Substitute some of the coffee with a shot of your favorite chocolate liqueur for a mocha-inspired tiramisu.
- Seasonal Delight: Incorporate seasonal fruits like berries or sliced peaches for a refreshing twist.
- Chocolate Twist: Incorporate chocolate-flavored liqueur or add cocoa to the mascarpone mixture for a more pronounced chocolatey taste.
- Fruit Infusion: Layer the tiramisu with fresh berries or a fruit compote for a refreshing twist.
- Alcohol-Free: Skip the liqueur for a family-friendly version without compromising on flavor.
- Party-Sized Portions: Transform the recipe into individual servings using ramekins or serving glasses for a stylish and convenient dessert presentation.
- Layering Creativity: Experiment with the layering sequence—try alternating ladyfingers and mascarpone for a unique texture in each bite.
- Customized Ladyfingers: Make homemade ladyfingers for a personal touch, adjusting their size to fit your serving dish perfectly.
- Expresso for Espresso: If short on time, substitute instant espresso for brewed coffee without sacrificing the bold coffee flavor.
- Fruit: Add layers of banana like our No Bake Banana Split Tiramisu Cake for a fruity twist.
Serving Suggestions: Elevate the Experience
Serve this Easy Tiramisu as a show-stopping finale to an Italian-themed dinner or as a delightful pick-me-up during afternoon tea. Pair it with a cup of freshly brewed coffee to enhance the overall experience.
- Affogato Affair: Serve tiramisu with a side of affogato – a scoop of vegan vanilla ice cream drowned in a shot of hot espresso.
- Tiramisu Parfait: Layer small portions of no eggs tiramisu in glasses for an elegant parfait presentation, perfect for dinner parties.
- Accompaniment Harmony: Pair tiramisu with a drizzle of chocolate or caramel sauce and a dollop of whipped cream for an indulgent dessert ensemble.
Storage and Freezer Instructions: Planning Ahead
- Make-Ahead Magic: Tiramisu tastes even better the next day. Prepare it a day in advance to allow the flavors to meld, making it an ideal make-ahead dessert for entertaining.
- Freezing Wisdom: While tiramisu can be frozen, it’s best to do so before dusting with cocoa powder. Wrap it tightly in plastic wrap and aluminum foil to prevent freezer burn.
- Thawing Tips: Thaw frozen tiramisu in the refrigerator for a gradual thaw, ensuring the dessert retains its texture and flavor.
- Reviving Staleness: If your ladyfingers lose their freshness, lightly brush them with additional coffee before layering to rejuvenate their texture.
Frequently Asked Questions (FAQs)
1. Can I make tiramisu without alcohol?
Absolutely! The alcohol or liqueur is optional, and you can still enjoy a delicious tiramisu without it. Alternatively, consider adding a splash of vanilla extract for an extra layer of flavor.
2. What can I use as a substitute for mascarpone cheese?
If you can’t find mascarpone, cream cheese can be a suitable substitute. Ensure the cream cheese is at room temperature for smooth blending.
3. Can I make tiramisu ahead of time?
Yes, in fact, tiramisu benefits from being made in advance. Prepare it a day ahead, allowing the flavors to meld and the dessert to set properly in the refrigerator.
4. How long does tiramisu last in the fridge?
When stored in an airtight container, tiramisu can last in the refrigerator for up to 3-4 days. However, for optimal freshness, it’s recommended to consume it within the first 48 hours.
5. Can I freeze tiramisu?
Yes, you can freeze our gluten-free tiramisu, but it’s best to do so before dusting with cocoa powder. Wrap it tightly in plastic wrap and aluminum foil. Thaw in the refrigerator for the best results.
6. What type of cocoa powder is best for dusting?
Use high-quality unsweetened cocoa powder for dusting. It adds a rich, bittersweet flavor that complements the sweetness of the mascarpone mixture.
7. Can I use decaffeinated coffee for tiramisu?
Certainly! If you prefer a decaffeinated version, feel free to use decaf coffee or espresso in the recipe. The focus is on the rich coffee flavor, regardless of the caffeine content.
8. How do I prevent my ladyfingers from becoming too soggy?
Dunk the ladyfingers quickly, ensuring each side is evenly moistened but not soaked. Over-soaking may result in a soggy texture, so a brief dip is key.
9. Can I make tiramisu in individual servings?
Absolutely! Create an elegant presentation by assembling tiramisu in individual glasses or ramekins. It’s a great way to serve this classic dessert at dinner parties or gatherings.
10. Can I customize the level of sweetness in tiramisu?
Certainly! Adjust the amount of powdered sugar according to your sweetness preference. Keep in mind that a balance of sweetness is crucial to complement the coffee flavors.
More delicious cake recipes you will love:
Unleash the rich symphony of flavors in this Tiramisu recipe, where luscious mascarpone, velvety dairy-free whipping cream, and robust coffee converge for an irresistible dessert. Elevate your culinary repertoire with this coffee-infused delight, blending powdered sweetness, gluten-free ladyfingers, and cocoa into a decadent masterpiece.
- 1 1/2 cups vegan heavy whipping cream , such as Silk, Cha's, Nature's Charm, Let's Do Organic or NutPods. You can also use regular heavy whipping cream if you're not dairy-free.
- 2/3 cup powdered sugar or powdered sweetener of choice sifted. You can use Lakanto powdered monk fruit sweetener or Swerve Confectioners for a lower sugar option.
- 8- ounce container vegan mascarpone cheese (such as Schlagfix) , room temperature. If you can't find vegan mascarpone, you can try making your own or sub with a thick dairy-free Greek-style plain yogurt or thick coconut based yogurt (such as Kite-Hill or Cocojune). Regular mascarpone works too if you're not dairy-free.
- 1 tsp vanilla extract
- 1 1/4 cups cold espresso or strongly brewed coffee
- 2 tsp alcohol of your choice , completely optional but feel free to add: dark rum, brandy or coffee flavored liqueur such as Kahlua or DaVinci brands.
- 24 gluten-free ladyfingers , One 7-ounce (200 gram Schär package. You can also use regular lady fingers (one 7-ounce 200 gram Savoiardi package) if you're not gluten-free.
- 2 - 3 Tbsp cacao powder or cocoa powder, for dusting the bottom and the top
- A little bit of shaved or very finely chopped dairy-free or regular chocolate, for garnish. We like Pascha's Chocolate, Hu's Kitchen, Eating Evolved, Lily's Sweets or Enjoy Life.
- In a mixing bowl, add the whipping cream and use a hand mixer and beat at medium speed for about 1 minute (or in the bowl of a stand mixer). Add the sifted powdered sugar and vanilla, and mix together until almost stiff peaks form. Add the mascarpone cheese and continue to whip until stiff peaks form. Set aside.
- Use a fine mesh sieve or sifter to lightly dust the bottom of an 8x8-inch dish with 1 Tbsp of the cocoa powder.
- In a wide shallow bowl (large enough to fit one ladyfinger), add the coffee and the optional liqueur (if using). Quickly dunk one ladyfinger at a time, turning it so that all the sides are just moistened evenly but not soaked (just a quick dunk otherwise the ladyfingers start to fall apart). Arrange the dunked ladyfinger, rounded side up, on the bottom of the prepared baking dish. Repeat with half of the ladyfingers, or until you’ve got an even single layer to fill up the bottom of the baking dish, breaking the ladyfingers in half as needed to fill in any large gaps.
- Spread half of the mascarpone mixture evenly onto the ladyfingers (an offset spatula works well).
- Dip and layer the remaining ladyfingers over the mascarpone layer in the baking dish.
- Pipe the top layer with the mascarpone mixture using a piping bag (you can also just spread and make a smooth even layer) over the top.
- Cover and chill in the fridge until set, for at least 3-4 hours or overnight.
- When ready to serve, use a fine mesh sieve or sifter to dust the top layer with the remaining cocoa powder, then sprinkle very lightly with a little bit of shaved chocolate. Chill again for 30 minutes.
- Cut into slices or scoop and serve.
How to store:
- Make-Ahead Magic: Tiramisu tastes even better the next day. Prepare it a day in advance to allow the flavors to meld, making it an ideal make-ahead dessert for entertaining.
- Freezing Wisdom: While tiramisu can be frozen, it's best to do so before dusting with cocoa powder. Wrap it tightly in plastic wrap and aluminum foil to prevent freezer burn.
- Thawing Tips: Thaw frozen tiramisu in the refrigerator for a gradual thaw, ensuring the dessert retains its texture and flavor.
- Reviving Staleness: If your ladyfingers lose their freshness, lightly brush them with additional coffee before layering to rejuvenate their texture.

 Did you try this recipe?


Leave a Comment