
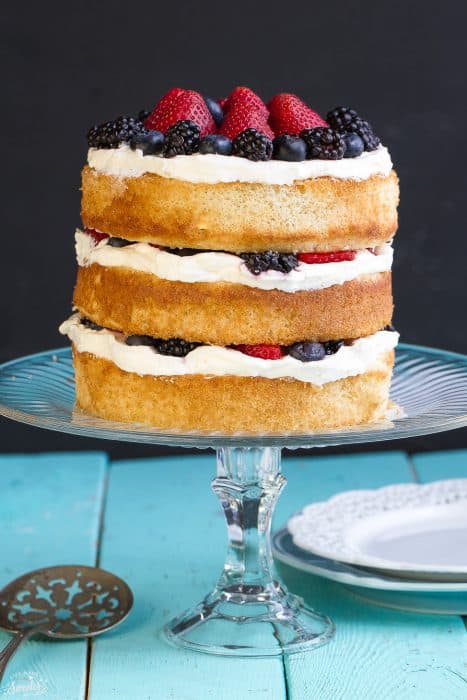
Indulge in the timeless charm of a Victoria Sponge Cake, featuring layers of light sponge, sweet jam, mixed berries and velvety whipped cream. This classic British dessert, named after Queen Victoria, is a must-try treat that captures the essence of elegance and simplicity. Includes gluten-free and dairy-free alternatives.
Delicious and Refreshing Berry Sponge Cake: A Perfect Summer Treat
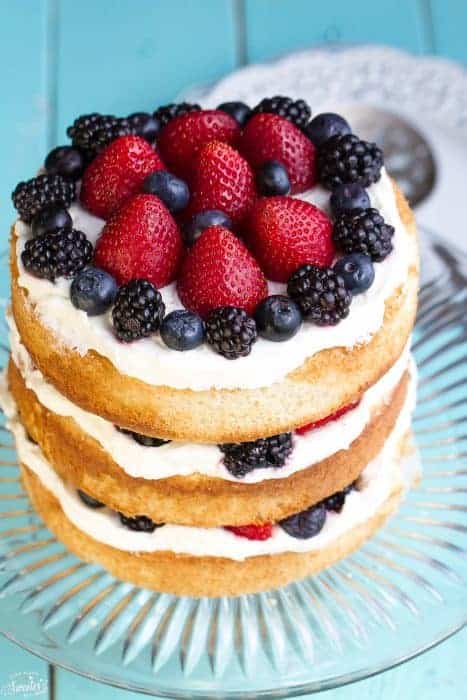
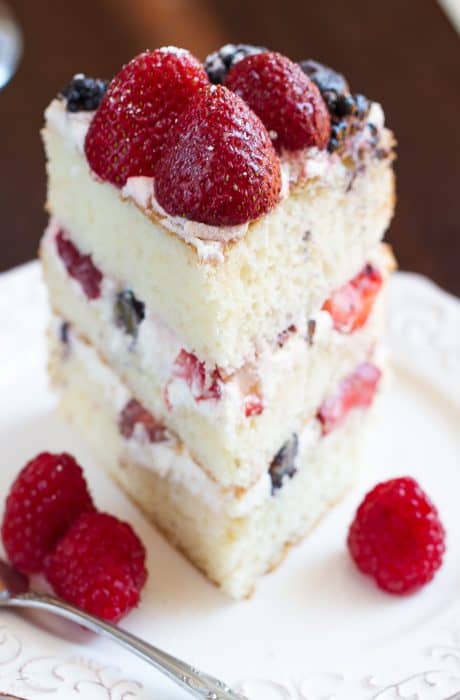
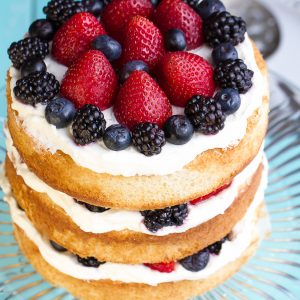
If you’re looking for a delightful dessert to celebrate the sweet flavors of summer, look no further than this Victoria Sponge Cake. Bursting with fresh strawberries, blueberries, and blackberries, this light and fluffy cake is sure to impress your family and friends. Whether you’re hosting a summer gathering or simply treating yourself to a slice of heaven, this cake is bound to impress.
What is a Victoria Sponge Cake?
When it comes to classic British desserts, one treat stands out among the rest—the Victoria Sponge Cake. Named after Queen Victoria herself, this timeless cake has been enjoyed for generations and remains a beloved favorite. With its simple yet elegant layers of sponge cake, luscious jam, and heavenly whipped cream, the Victoria Sponge Cake is a true delight for the senses.
A Brief History: Fit for Royalty
The Victoria Sponge Cake holds a special place in British culinary history. Legend has it that this cake was a personal favorite of Queen Victoria, who had a penchant for enjoying a slice with her afternoon tea. Its popularity grew during the Victorian era, and it quickly became a staple of British baking.
The Elements of a Victoria Sponge Cake: Simplicity Perfected
The beauty of a Victoria Sponge Cake lies in its simplicity. The cake consists of the following key elements:
- Sponge Cake Layers: The foundation of the cake is made up of two layers of light and airy sponge cake. Traditionally, these layers are plain and free from any additional flavorings or additions.
- Jam Filling: The layers of sponge cake are generously spread with a layer of fruity jam, typically strawberry or raspberry. This adds a burst of sweetness and complements the cake’s delicate flavor.
- Whipped Cream: The crowning glory of the Victoria Sponge Cake is the layer of velvety whipped cream. It adds a luxurious and creamy texture, balancing the sweetness of the jam and cake layers.
- Powdered Sugar: A final dusting of powdered sugar over the top completes the elegant and classic appearance of the cake.
Recipe Ingredients
The ingredients used in this Sponge Cake with berries come together to create a harmonious blend of flavors. Here’s a list of the ingredients and why they are incorporated:
For the Sponge Cake
- Eggs: These act as the main binding agent, providing structure to the cake.
- Granulated Organic Cane Sugar: Adds sweetness to the cake. You can also use alternative sweeteners like granulated pure maple sugar or your preferred sweetener for a lower sugar option.
- Vanilla Extract: Enhances the overall flavor profile of the cake.
- Lemon Zest: Adds a refreshing citrus note that complements the berries perfectly.
- All-Purpose Flour (or Gluten-Free 1-1 Baking Flour): Forms the base of the cake, providing structure and texture. Bob’s Red Mill is a recommended brand for gluten-free flour.
- Baking Powder: Helps the cake rise and creates a light, airy texture.
- Salt: Balances the sweetness and enhances the flavors.
- Unsalted Butter: Adds richness and moisture to the cake batter. For those with dietary restrictions, you can use vegan butter such as Miyokos as a dairy-free alternative.
- Fresh Strawberries, Blueberries, and Blackberries: These vibrant berries not only adorn the cake but also infuse it with bursts of sweet and tangy flavors.
For the Stabilized Whipped Cream:
- Heavy Cream: Whips up into a fluffy and creamy topping. For those with dietary restrictions, you can use dairy-free creamer or dairy-free cream such as Nutpods as a dairy-free alternative.
- Organic Powdered Sugar: Sweetens the whipped cream. Alternatively, you can use powdered pure maple sugar or your preferred powdered sweetener for a lower sugar option.
- Vanilla Extract: Adds a hint of warmth and aroma.
- Unflavored Gelatin: Stabilizes the whipped cream, allowing it to hold its shape.
- Cold Water: Used to dissolve the gelatin and create the stabilizing agent.
How to make a Sponge Cake
Make the cake:
- Preheat the oven to 350 F. Spray three 6-inch round cake pans (or two 8 inch pans) with baking spray and line bottoms with parchment paper. In the bowl of a stand mixer, beat together the eggs, sugar, and vanilla until it has tripled in volume – about 10 minutes. The mixture should be thick, creamy and pale. Add the lemon zest.
- Sift the flour, baking powder and salt into a separate bowl or a large parchment paper on the counter. Stir into stand mixer using a plastic or metal spoon, preferably in batches. Add the melted butter and gently fold it into the cake batter mix.
- Divide the batter evenly between the pans and gently smooth the tops. Tap the cake pans on the counter to remove any air bubbles.
- Bake in preheated oven for 21-25 minutes or until the sponges are evenly golden and come away from the sides of the baking pans.
- Allow the cakes to cool in their pans for 10 minutes. After 10 minutes, turn them onto the wire rack carefully and allow the cakes to cool completely.
Whipped Cream:
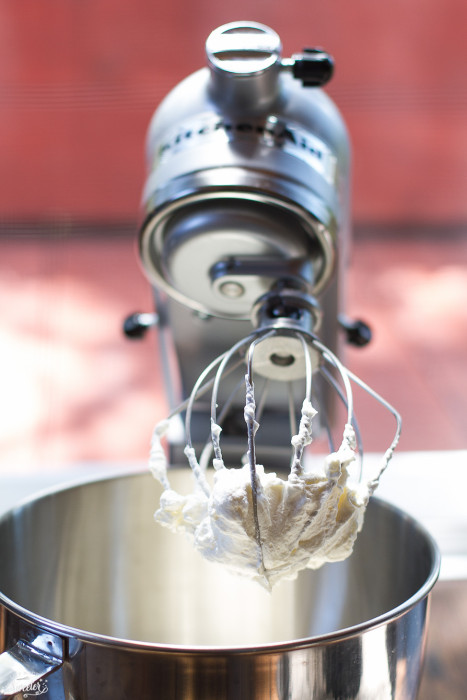
- Meanwhile, make the whipped cream In a small pan, combine gelatin and cold water and allow to sit for 5 minutes until thick. Place over low heat, stirring constantly, just until the gelatin dissolves. Remove from heat and allow to cool slightly (but do not let it set). Using a stand mixer, whip the heavy cream with the icing sugar until soft peaks form. While slowly beating, add the gelatin to the whipping cream. Whip at high speed until stiff peaks form.
Assemble:
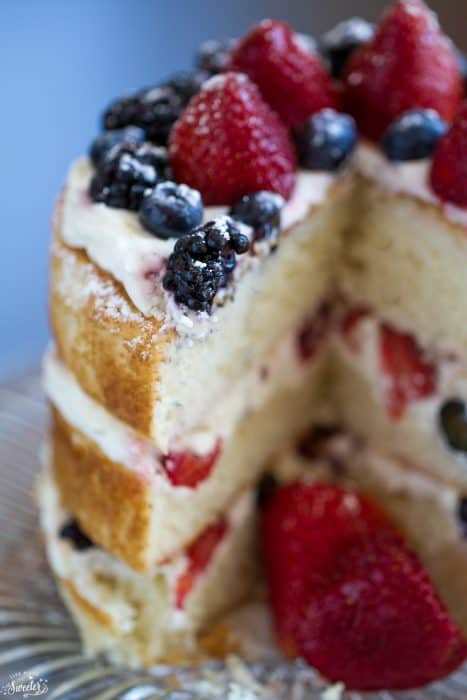
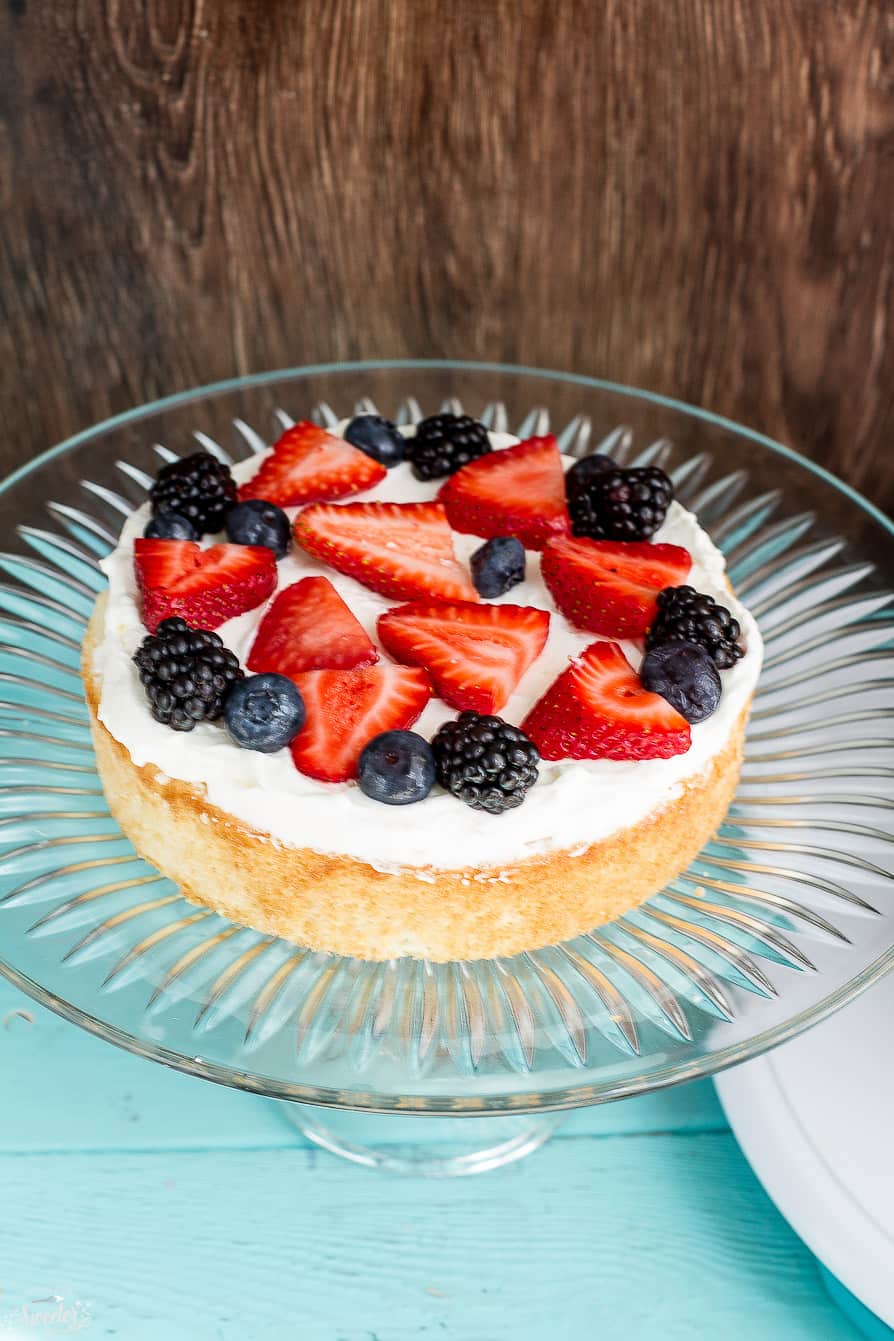
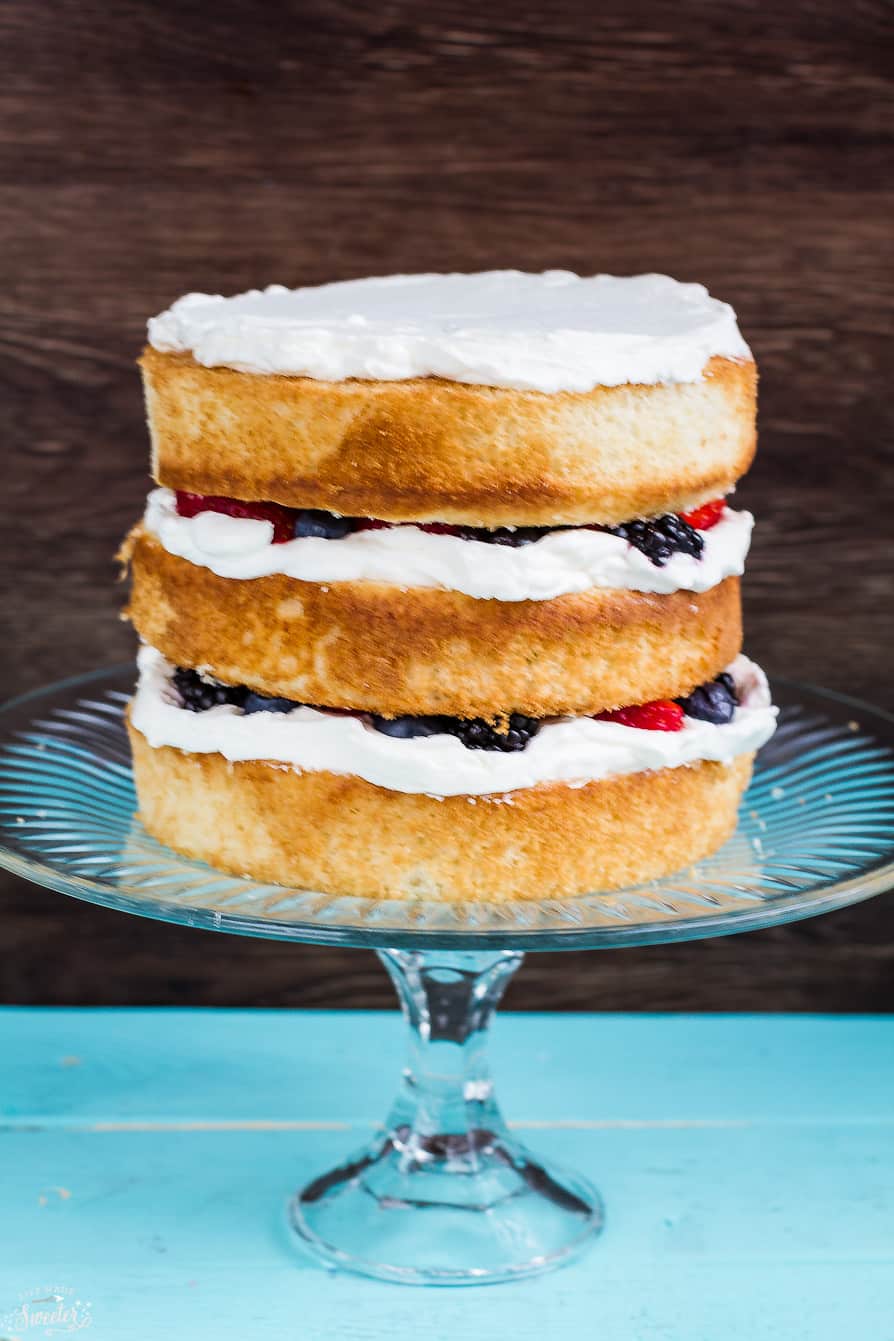
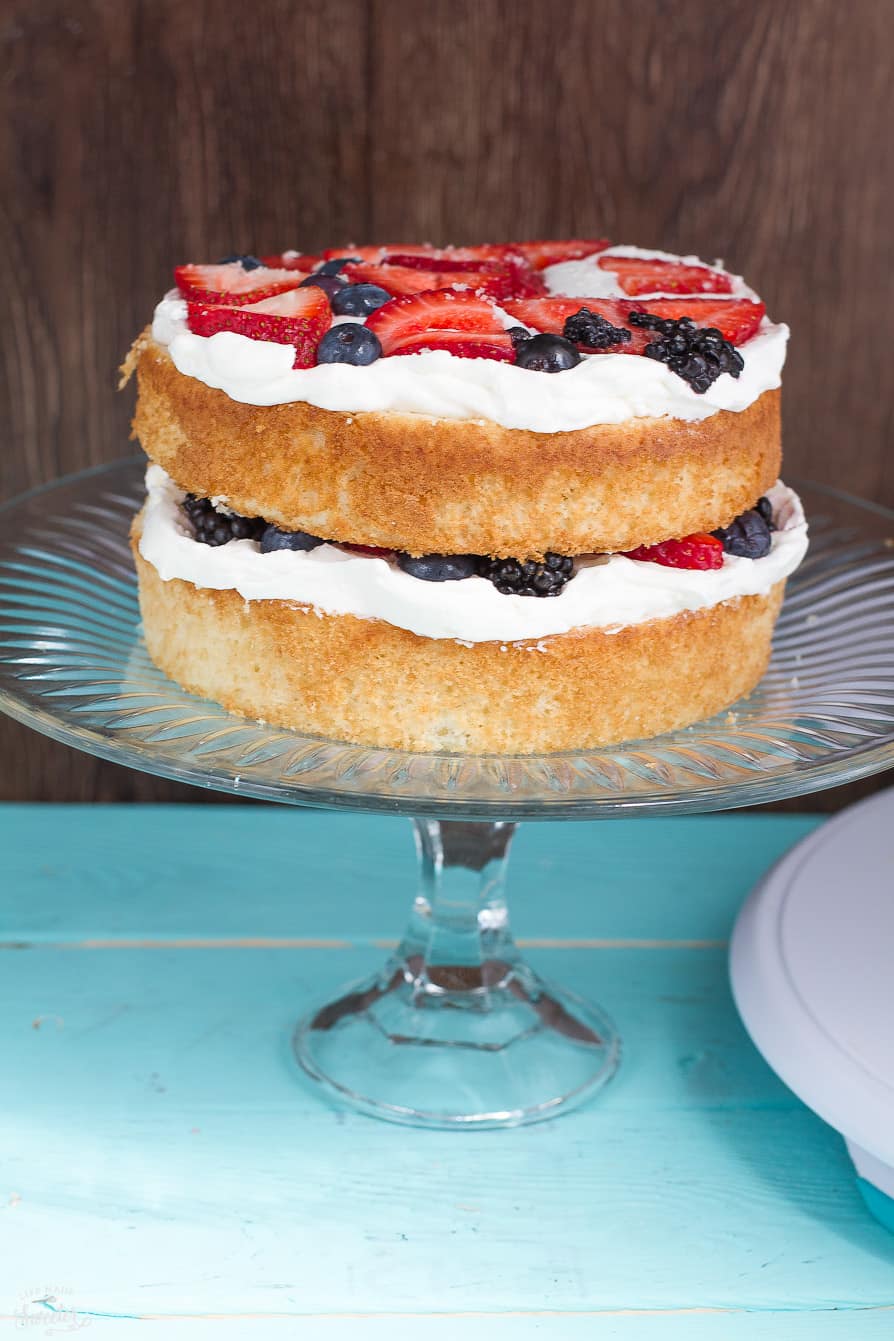
- Place your first layer of cake on top of a cardboard circle, serving plate or cake stand. Spoon a generous layer of whipped cream and spread evenly using an offset spatula. Place an even layer of sliced strawberries and berries on top of the whipped cream.
 Add the second layer of cake and repeat until all of the layers are on the cake.
 - For the top layer, spread on with a generous layer of whipped cream and spread evenly using an offset spatula. Garnish with fresh strawberries, blueberries, and blackberries. Dust with powdered sugar.
Tips for Success: Creating the Perfect Berry Sponge Cake
To ensure your Fresh Berry Sponge Cake turns out beautifully, here are some helpful tips to keep in mind:
- Room Temperature Eggs: Allow the eggs to come to room temperature before using. This ensures proper emulsification and aeration, resulting in a lighter cake.
- Whipping the Eggs and Sugar: Beat the eggs, sugar, and vanilla extract until the mixture triples in volume. This step is crucial for achieving a fluffy and tender sponge cake.
- Sifting the Dry Ingredients: Sift the flour, baking powder, and salt to remove any lumps and ensure even distribution of leavening agents. This promotes a uniform rise and texture in the cake.
- Gentle Folding: When incorporating the dry ingredients and melted butter into the cake batter, use a gentle folding motion to maintain the airiness and prevent deflation.
- Cooling the Cakes: Allow the cakes to cool completely on a wire rack before assembling. This prevents the whipped cream from melting and ensures a stable structure.
- Stabilized Whipped Cream: The addition of gelatin helps the whipped cream hold its shape and remain firm for an extended period. Be sure to follow the instructions for dissolving and incorporating the gelatin properly.
Storage and Freezer Instructions: Enjoying Every Last Slice
If you happen to have any leftovers, you can store the Berry Sponge Cake in the refrigerator for up to 3 days. Make sure to cover it tightly with plastic wrap or store it in an airtight container to prevent drying out.
Alternatively, if you’d like to savor this delectable treat at a later time, you can freeze the unfrosted cake layers. Wrap each layer individually in plastic wrap and place them in a freezer-safe bag or container. They can be frozen for up to 3 months. When ready to use, thaw the cake layers in the refrigerator overnight and proceed with assembling and frosting.
Serving Suggestions: Enhancing the Experience
The Fresh Berry Sponge Cake is delightful on its own, but you can elevate the experience even further with these serving suggestions:
- Fresh Berry Coulis: Drizzle a luscious berry coulis over each slice of cake for an extra burst of fruity goodness.
- Whipped Cream Dollop: Serve each slice with a dollop of freshly whipped cream on the side for added indulgence.
- Mint Sprigs: Garnish the serving platter with fresh mint sprigs to add a touch of vibrant green color.
Variations and Substitutions: Personalize Your Cake
Feel free to personalize this Mary Berry Victoria Sponge Cake to suit your taste preferences. Here are some variations and substitutions you can try:
- Mixed Berry Medley: Experiment with different combinations of berries, such as raspberries or even a mix of your favorites.
- Citrus Twist: Instead of lemon zest, try incorporating orange zest for a citrusy twist.
- Chocolate Indulgence: If you’re a chocolate lover, add a layer of chocolate ganache or chocolate shavings between the cake layers for a decadent touch.
Recipe Notes
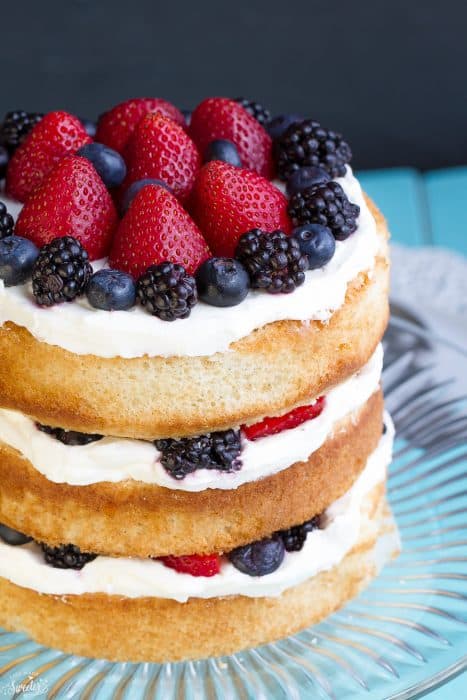
- Take care to evenly distribute the berries between the layers to ensure a balanced and visually appealing presentation.
- Dust the finished cake with powdered sugar just before serving to give it an elegant and festive look.
- Feel free to adjust the sweetness level by reducing the amount of sugar or using alternative sweeteners. Keep in mind that this may slightly alter the texture and taste of the cake.
More delicious cake recipes you will love:
Indulge in the timeless charm of a Victoria Sponge Cake, featuring layers of light sponge, sweet jam, mixed berries and velvety whipped cream. This classic British dessert, named after Queen Victoria, is a must-try treat that captures the essence of elegance and simplicity. Includes gluten-free and dairy-free alternatives.
- 6 large eggs , room temperature
- 1 cup sugar
- 1 teaspoon pure vanilla extract
- 1 teaspoon lemon zest
- 1 cup all-purpose flour or gluten-free 1-1 baking powder such as Bob's Red Mill or Cup4Cup.
- 1 1/2 teaspoons baking powder
- 1/4 teaspoon salt
- 2 tablespoons unsalted butter melted. You can also use any vegan butter such as Miyokos as a dairy-free alternative.
- 1/3 - 1/2 cup fresh strawberries sliced thinly
- 1/2 cup blueberries
- 1/2 cup blackberries
- 1-1/3 cups heavy cream , you can also use an dairy-free creamer or dairy-free cream such as Nutpods as a dairy-free alternative.
- 3 tablespoons organic powdered sugar , alternatively you can use your preferred powdered sweetener for a lower sugar option, such as Lakanto or Swerve.
- 1 teaspoon pure vanilla extract
- 1 teaspoon unflavored gelatin
- 4 teaspoons cold water
- 1 - 1-1/2 cups fresh whole strawberries, blueberries, and blackberries
- powdered sugar , alternatively you can use your preferred powdered sweetener for a lower sugar option, such as Lakanto or Swerve.
- Make the cake: Preheat the oven to 350 F. Spray three 6-inch round cake pans (or two 8 inch pans) with baking spray and line bottoms with parchment paper.
- In the bowl of a stand mixer, beat together the eggs, sugar, and vanilla until it has tripled in volume - about 10 minutes. The mixture should be thick, creamy and pale. Add the lemon zest.
Sift the flour, baking powder and salt into a separate bowl or a large parchment paper on the counter. Stir into stand mixer using a plastic or metal spoon, preferably in batches.
- Add the melted butter and gently fold it into the cake batter mix.
- Divide the batter evenly between the pans and gently smooth the tops. Tap the cake pans on the counter to remove any air bubbles.
- Bake in preheated oven for 21-25 minutes or until the sponges are evenly golden and come away from the sides of the baking pans.
- Allow the cakes to cool in their pans for 10 minutes. After 10 minutes, turn them onto the wire rack carefully and allow the cakes to cool completely.
Meanwhile, make the whipped cream
In a small pan, combine gelatin and cold water and allow to sit for 5 minutes until thick. Place over low heat, stirring constantly, just until the gelatin dissolves.
- Remove from heat and allow to cool slightly (but do not let it set).
- Using a stand mixer, whip the heavy cream with the icing sugar until soft peaks form.
- While slowly beating, add the gelatin to the whipping cream. Whip at high speed until stiff peaks form.
- Place your first layer of cake on top of a cardboard circle, serving plate or cake stand.
- Spoon a generous layer of whipped cream and spread evenly using an offset spatula.
- Place an even layer of sliced strawberries and berries on top of the whipped cream.
- Add the second layer of cake and repeat until all of the layers are on the cake.
- For the top layer, spread on with a generous layer of whipped cream and spread evenly using an offset spatula.
- Garnish with fresh strawberries, blueberries, and blackberries. Dust with powdered sugar.
Disclaimer: This updated post was generated on June 29, 2023 by ChatGPT, an AI language model, and all info should be reviewed and validated by a human for accuracy and relevancy before implementation.


Helen -
Yum! This was a hit! Thank you!
Cheryl S -
This was delicious! Thanks!