
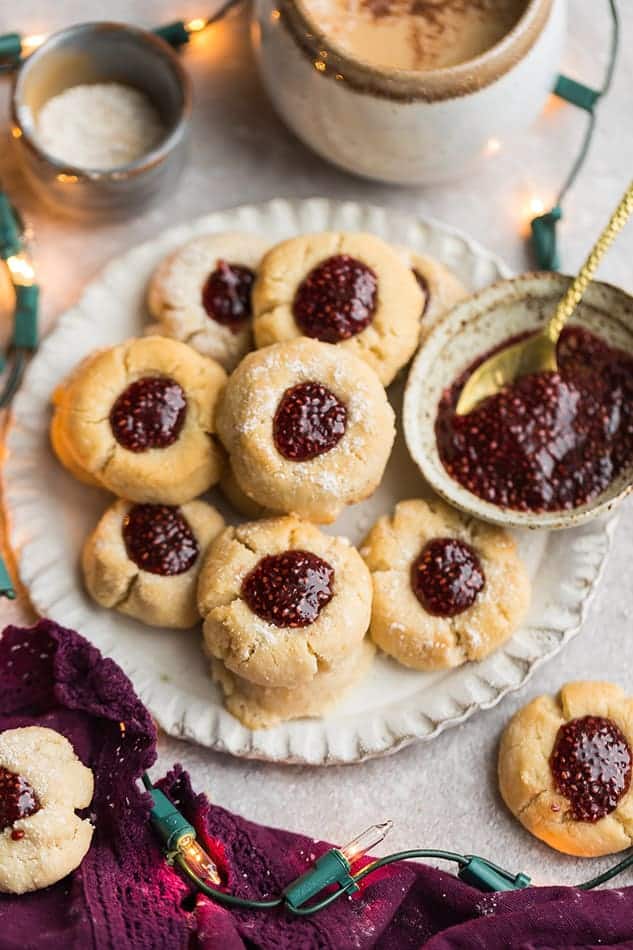
These Thumbprint Cookies are a holiday classic cookie with with the perfect balance of nuttiness and sweetness in every bite. Soft, chewy and made with a wholesome blend of almond flour, dairy-free butter and pure maple syrup creating a delectable symphony of flavors for holiday gifting and snacking.

PIN HERE for later and follow my boards for more recipe ideas
Updated December 2023
Thumbprint Cookies: Elevate Your Sweet Moments with These Irresistible Treats
Craving a delightful dessert that’s as elegant as it is delicious? Look no further than these Thumbprint Cookies – a perfect blend of almond goodness, vegan-friendly options, and a hint of homemade sweetness.
The jam cookies are tender and buttery, despite being dairy-free and egg-free. They’re filled with a rich and luscious chia seed jam, and they’re super easy to make.
Elevate your holiday baking skills and dessert game with these delectable shortbread cookies that are sure to leave a lasting impression. Whether you’re a seasoned baker or a novice in the kitchen, these classic holiday cookies are a must-make for the holidays and a foolproof way to impress. They are sure to be a hit whether you are serving them at your next holiday gathering or enjoying this holiday treat on a cozy night in by the fire.
Ingredients You’ll Need:
Crafting the Perfect Cookie
Superfine Blanched Almond Flour: The foundation of these gluten-free cookies, almond flour brings a unique texture and nutty flavor that sets these treats apart.
Vegan Butter or Coconut Oil: For a plant-based twist, opt for softened vegan butter or solid organic refined coconut oil. Ghee or regular unsalted butter work too for those not on a dairy-free or plant-based journey.
Maple Syrup or Sweetener of Choice: Sweeten the deal with pure maple syrup or your preferred sticky liquid sweetener. From agave, vegan honey, coconut nectar syrup or sugar-free maple sweetener, the choice is yours.
Vanilla and Almond Extracts: Vanilla extract adds a classic sweetness, while almond extract enhances the signature sugar cookie taste. An optional but highly recommended addition.
Coconut Sugar or Brown Sugar Substitute: Adding depth to the sweetness, unrefined coconut sugar or a sugar-free brown sugar substitute like golden monk fruit sweetener balances the flavors.
Homemade Sugar-Free Jam: The star of the show! Whether it’s strawberry, raspberry, or your favorite sugar-free preserves, this jam brings a burst of fruity goodness to the center of each cookie.
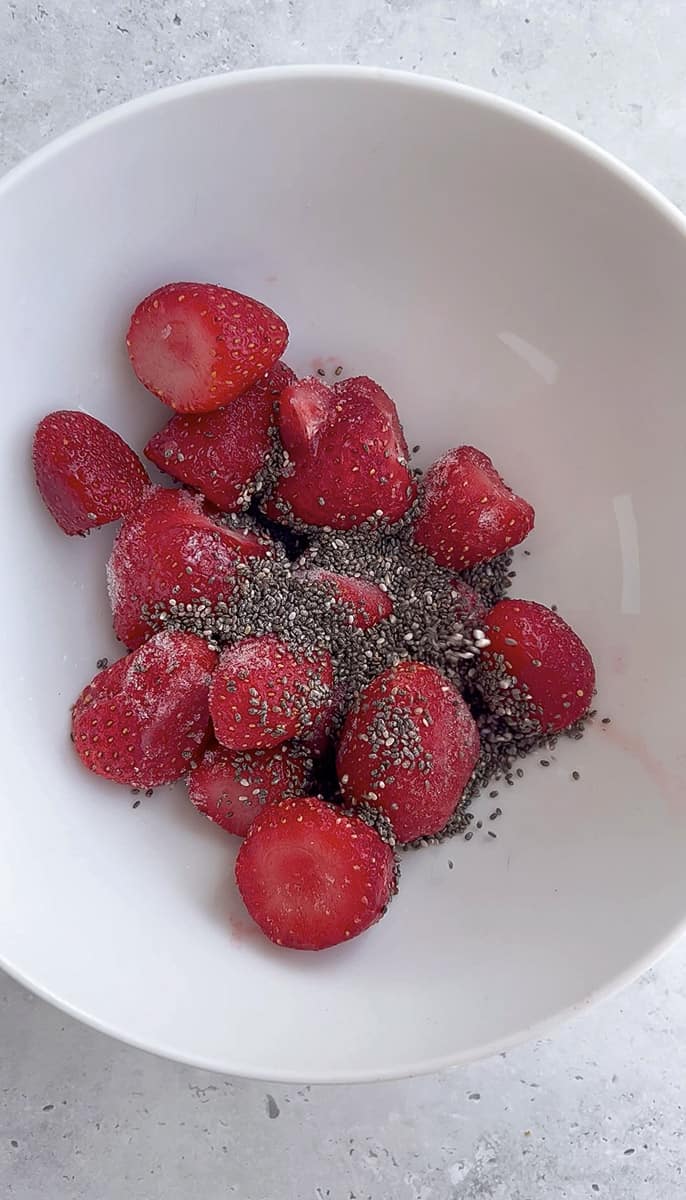
Homemade Chia Berry Jam
Berries and Sweetener: Choose raspberries, strawberries or your preferred berries and sweeten them to perfection with maple syrup or your sweetener of choice. You can use fresh berries or frozen berries.
Chia Seeds: These tiny powerhouses add thickness and texture to the jam, creating the perfect filling for your Thumbprint Cookies.
Lemon Juice: A touch of citrus brightens the flavor profile and complements the sweetness of the berries.
Instructions: How to make Thumbprint Cookies
1. Prepare the Cookie Dough:
- In a large bowl, combine almond flour, vegan butter, maple syrup, and extracts.
- Mix until a cohesive dough forms, then chill for 30 minutes.

2. Shape and Bake:
- Form 1.5-inch balls, roll in sugar substitute, and create an indentation.


- Freeze briefly, then bake at 360°F for 10-11 minutes, avoiding overbaking.

3. Make Homemade Chia Berry Jam:
- Cook berries until they break down, mash, and add sweetener and lemon juice.
- Stir in chia seeds, let it thicken, and cool to room temperature.
3. Cool and Fill: Remove the cookies from the oven and let them cool on the baking sheet. Once they’re cool, transfer them to a wire rack. Fill the indentation of each cookie with jam, then devour!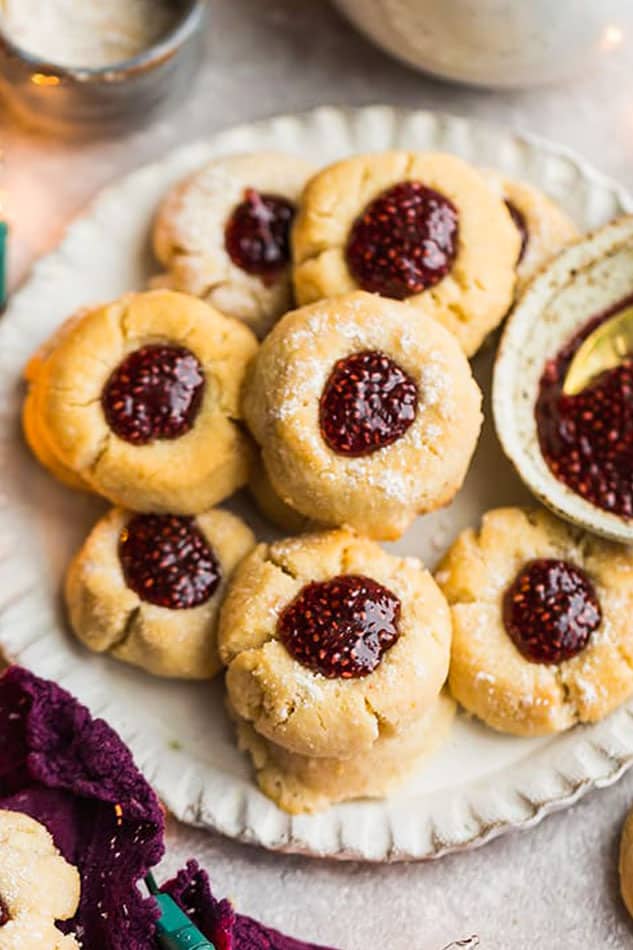
Tips for Success
Here are a few tricks and tips for this jam thumbprint cookie recipe.
- Let the cookies cool fully. After the cookies come out of the oven, let them cool fully before assembling them. If you put the jam on the cookies while they’re still warm, the jam might melt.
Storage and Freezer Instructions: Savor the Sweetness Anytime
Storage: Once cooled, store your jam thumbprint cookies in an airtight container at room temperature for up to 3 days. You can also store them in the fridge for up to 5 days.
Freezer-Friendly: These cookies freeze exceptionally well. Place them in a single layer in a freezer-safe container with parchment paper between layers. Enjoy up to three months later! Thaw at room temperature or in the fridge, or heat in the oven or toaster oven.
- Prepare ahead of time. You can make the separate parts ahead of time. Not only is this convenient, but it gives the flavors more time to meld together. You can store the unbaked cookie dough, rolled out into balls, in the fridge for up to 4 days, or in the freezer for up to 3 months. And you can store the chia berry jam in the fridge for up to 2 weeks, or in the freezer for up to 3 months.

More Must-Try Vegan Holiday Cookie Recipes
Here are a few of our other favorite vegan cookies to bake.
- Vegan snickerdoodles
- Vegan sugar cookies
- Vegan skillet cookie
- Vegan chocolate chip cookies
- Easy vegan gingerbread cookies
These Thumbprint Cookies are a holiday classic cookie with with the perfect balance of nuttiness and sweetness in every bite. Soft, chewy and made with a wholesome blend of almond flour, dairy-free butter and pure maple syrup creating a delectable symphony of flavors for holiday gifting and snacking.
- 1 1/2 cups superfine blanched almond flour , you can also use tiger nut flour or gluten-free finely ground oat flour for a nut-free alternative.
- 1/4 cup softened vegan butter , OR solid organic refined coconut oil (not melted – you want the consistency to be similar to softened butter). Ghee or unsalted butter work too if you're not dairy-free or plant-based.
- 1/3 cup pure maple syrup , OR preferred sticky liquid sweetener of choice such as agave, date syrup, coconut nectar syrup, allulose, vegan honey or Lakanto sugar-free maple syrup for a lower sugar option.
- 1 tsp pure vanilla extract
- 1/4 tsp pure almond extract , optional but it that signature sugar cookie taste / flavor.
- 3 Tbs. coconut sugar , OR brown sugar substitute of choice such as golden monk fruit sweetener or Brown Swerve for a lower sugar option.
- 1/4 cup Homemade sugar-free strawberry jam / raspberry jam , OR your favorite sugar-free preserves such as Walden Farms, Smuckers or Crofters
- 1/2 cup fresh or frozen raspberries or strawberries
- 1-2 tablespoons pure maple syrup , OR preferred sticky liquid sweetener of choice such as agave, date syrup, coconut nectar syrup, allulose, vegan honey or Lakanto sugar-free maple syrup for a lower sugar option.
- 2 teaspoons chia seeds
- 1 teaspoon fresh lemon juice
Cook your berries of choice in a saucepan over medium heat until they begin to break down, about 5 minutes.
Mash it down or leave it chunky. Stir in the lemon juice and maple syrup. Cook for 5 more minutes, remove from heat and stir in the chia seeds. Let stand until it begins to thicken, adding water if needed to thin out until desired consistency is reached. Allow to cool to room temperature and store in an airtight container in the fridge for a week or two and in the freezer for up to three months.
In a large mixing bowl, combine the almond flour, vegan butter, maple syrup, vanilla and almond extract, if using. Mix well with a fork until dough is combined.
- Cover bowl and chill in the fridge for 30 minutes.
- Remove dough from fridge. Form the dough into 1.5 inch balls and roll into brown sugar substitute or coconut sugar. Make an indentation using your thumb or a 1/4 teaspoon in the center of each dough.
Place on a large parchment lined baking sheet about 1.5 inches apart. Place the pan in the freezer while you preheat the oven.
Meanwhile, preheat oven to 360F. Bake for 10-11 minutes, until just set. Be careful not to overbake as the cookies will continue to bake after you remove them from the oven.
- Remove from oven and indent into the center of each cookie again, if necessary.
Allow to cool completely and fill with jam. Transfer to wire rack or cookie tray – do not transfer warm cookies, otherwise they will break apart.
How to Store
Storage: Once cooled, store your jam thumbprint cookies in an airtight container at room temperature for up to 3 days. You can also store them in the fridge for up to 5 days.
How to freeze:
You can either freeze the unbaked dough balls or the baked cookies.
To freeze dough balls, simply place the dough balls in a baking sheet and freeze for 20 minutes. Then transfer the dough balls to a large zip-lock bag.
To freeze baked thumbprint cookies, simply place the cookies on a baking sheet in a single layer and freeze for 20 minutes. Then transfer the cookies to an airtight resealable container and freeze for up to 3 months.


Leave a Comment