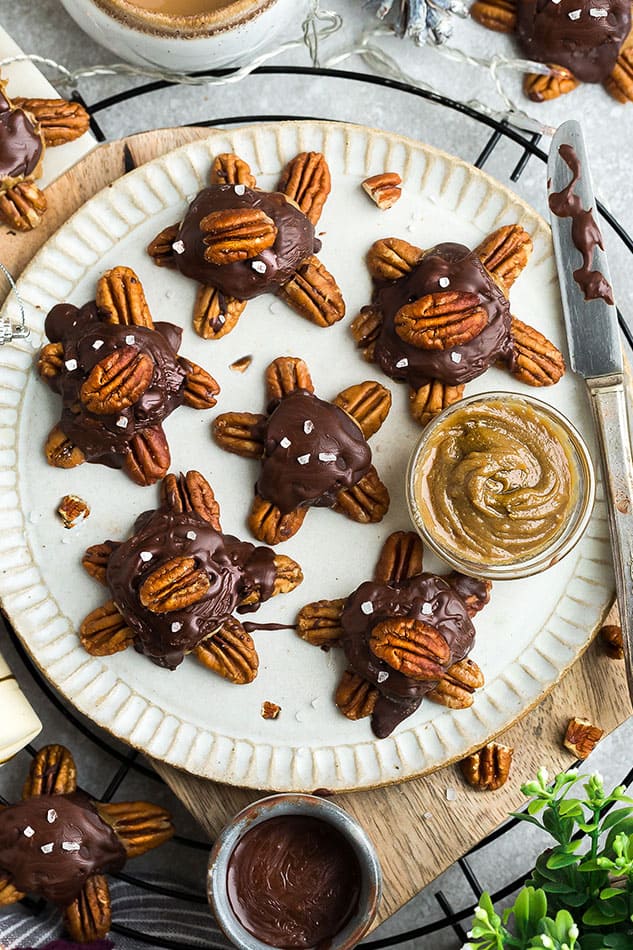
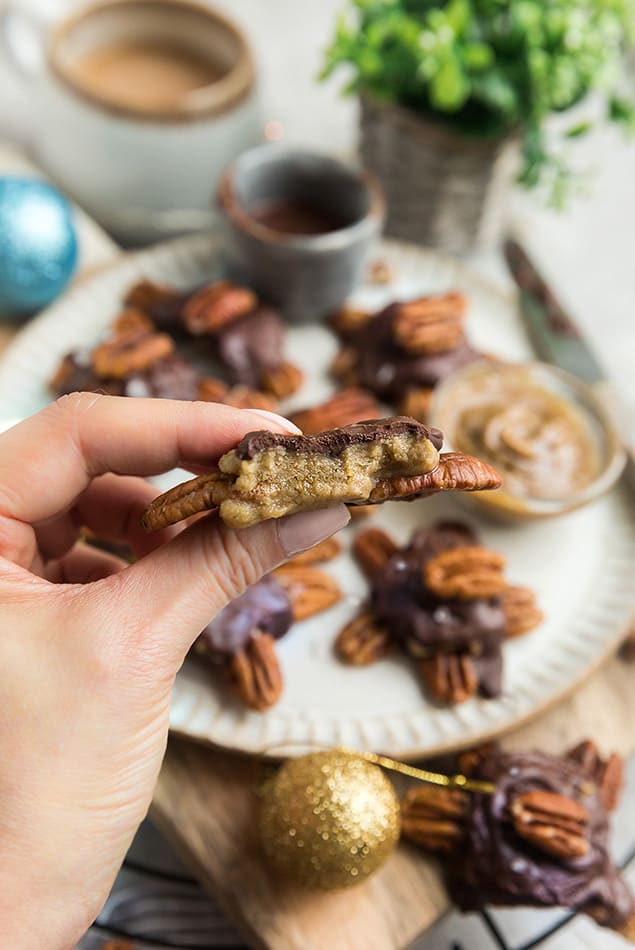
These homemade Chocolate Turtle Candies feature roasted pecans, creamy pecan butter, pure maple syrup, and dairy-free chocolate chips for a delectable treat that’s both easy and delightful. Satisfy your sweet tooth with these classic candies for the perfect wholesome holiday treat!
PIN HERE for later and follow my boards for more recipe ideas
Updated December 2023
Decadent Chocolate Turtle Candies: A Sweet Delight for Every Occasion
Indulge your sweet tooth with these heavenly Chocolate Turtle Candies – a delightful treat that combines the richness of pecan clusters, the creaminess of nut butter, and the decadence of dairy-free chocolate.
Homemade Turtles are a classic candy perfect for holiday gifting or satisfying your dessert cravings, these candies are not only delicious but also easy to make. They are sweet, chewy, crunchy and definitely a favorite when it comes to classic holiday treats.
This chocolate turtles candy recipe is not only delicious but it’s a healthier take on the classic chocolate covered turtles you buy in the store. Plus, they take less than 10 minutes of prep and you’ll only need a handful of ingredients that you can easily customize. They are the perfect gluten free, sugar-free, dairy-free, paleo, low carb and keto-friendly recipe to make for your friends, family and neighbors.
If you’re looking for more chocolate turtles recipes, you can also check out my Pretzel Turtles or Turtle Thumbprint Cookies
Ingredients You’ll Need:
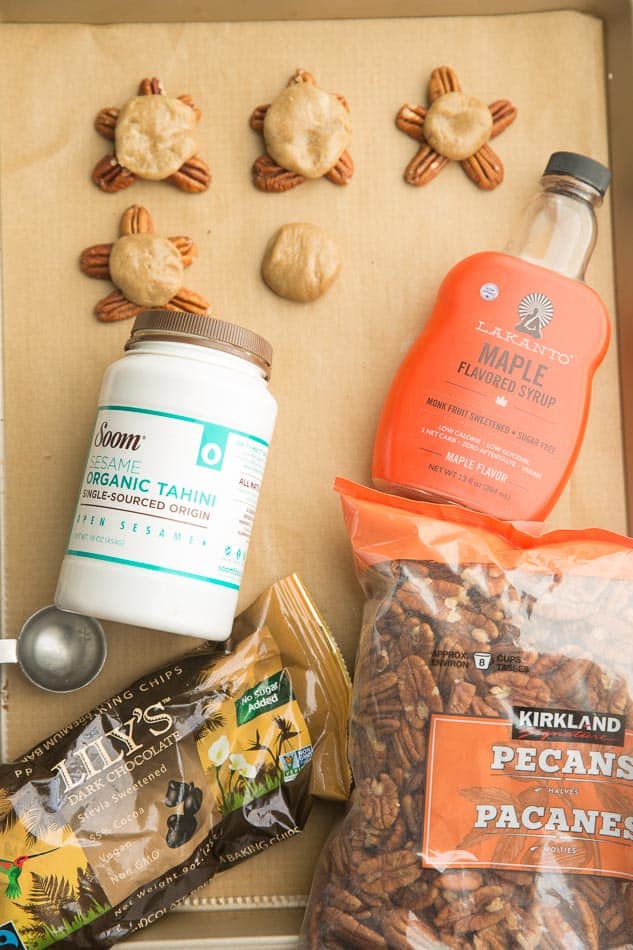
You’ll only need a few simple and wholesome ingredients when making your own homemade chocolate turtles:
- Roasted Pecan Halves: A crunchy base that adds a robust nutty flavor.
- Smaller Pecan Pieces: For the adorable heads of our chocolate turtles.
- Creamy Pecan Butter: Elevates the texture and taste; you can also experiment with cashew butter, sunflower seed butter or another nut butter or seed butter of your choice..
- Pure Maple Syrup: Adds natural sweetness; explore alternatives like vegan honey or date syrup. For a lower sugar option, opt for Lakanto sugar-free maple syrup, allulose or yacon syrup.
- Melted Coconut Oil: Provides a luscious, neutral foundation; opt for refined coconut oil for a subtler taste. ou can also use another neutral oil.
- Vanilla Extract: Enhances the overall flavor profile.
- Ground Cinnamon: A hint of warmth to complement the sweetness.
- Dairy-Free Chocolate Chips: We recommend Pascha’s Chocolate, Hu’s Kitchen Gems, or Lily’s Sweets. Regular dairy chocolate chips will work too if you’re not dairy-free.
- Coconut Oil for Chocolate Coating: Ensures a smooth, glossy finish. You can use refined coconut oil or another neutral oil for a subtler taste.
- Maldon Flake Sea Salt: A finishing touch for the perfect balance of sweet and salty.
Instructions: How to make Chocolate Turtle Candies
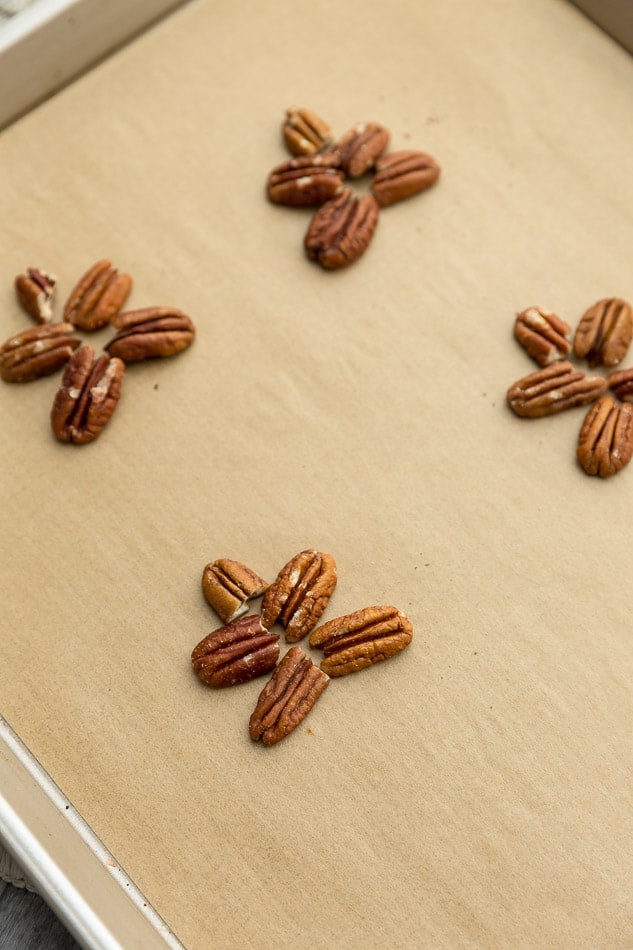
- Cluster Creation: Arrange four pecan halves into clusters, using smaller pecan pieces for the heads. Place them on a parchment-lined baking sheet.

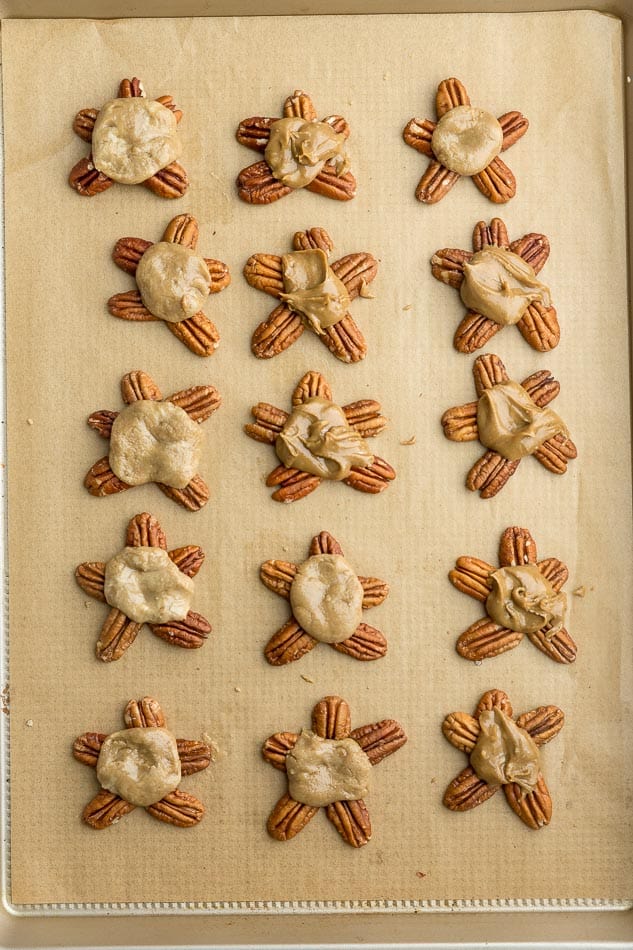
- Nut Butter Alchemy: Combine nut butter, maple syrup, melted coconut oil, vanilla extract, and ground cinnamon. After chilling, shape into discs and place on the pecan clusters.

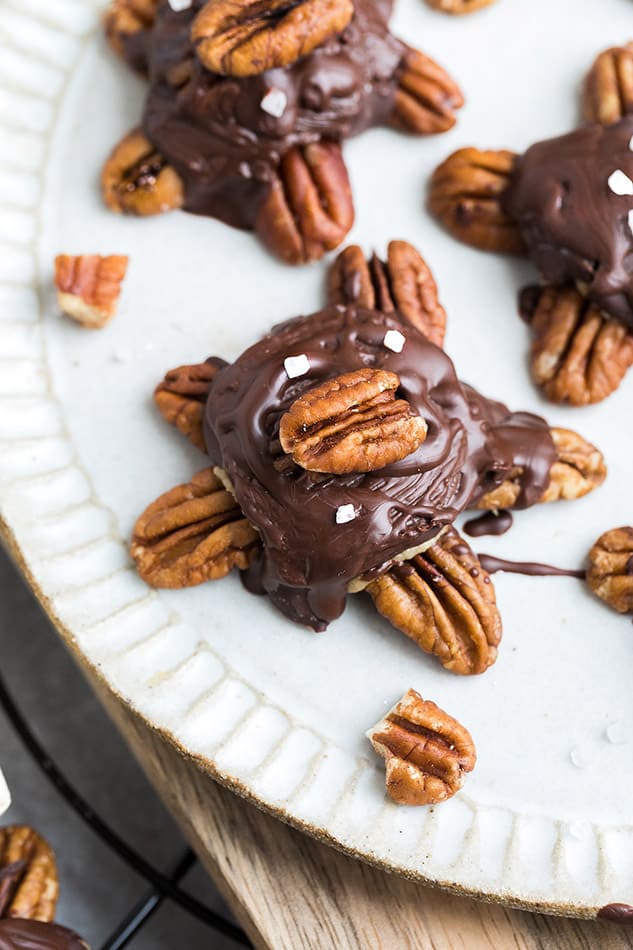
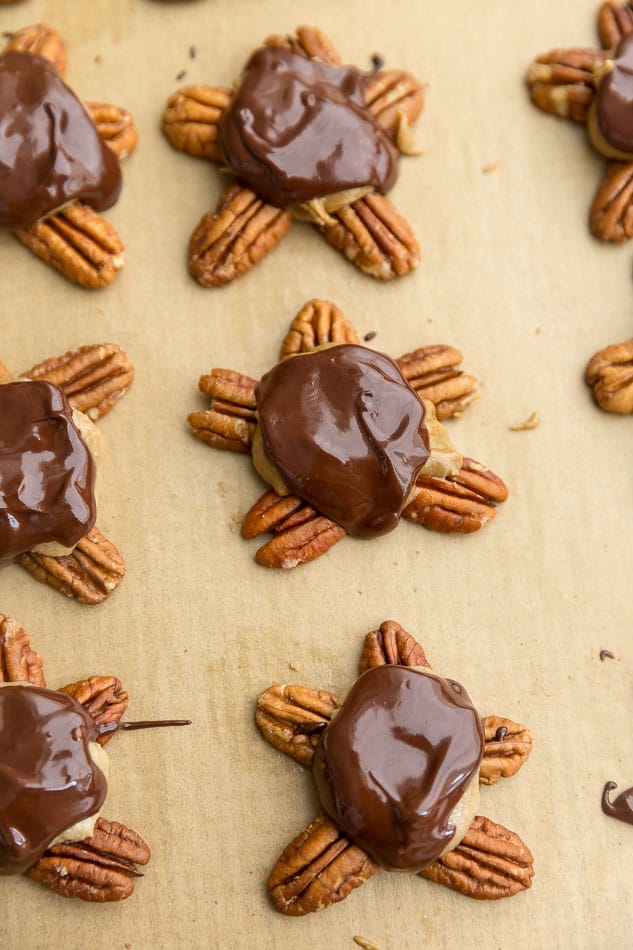
- Chocolate Coating: Melt chocolate and oil, then generously spoon over each turtle.

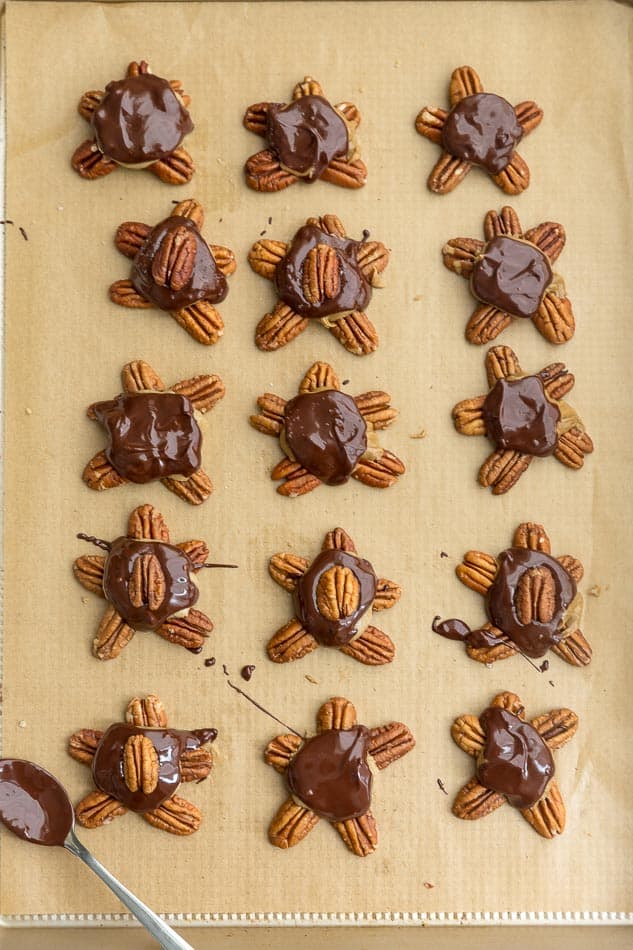
- Finishing Touches: Sprinkle sea salt and garnish with a single pecan. Allow the chocolate to set – refrigerate for a quicker process.

Tips for Success: Crafting the Perfect Chocolate Turtle
- Uniformity Matters: Arrange pecan clusters with similar-sized halves for a visually appealing presentation.
- Chill the Nut Butter Mixture: For an even richer flavor and ideal texture, let the nut butter mixture rest in the fridge for at least an hour. This step ensures a satisfyingly thick consistency reminiscent of caramel or cookie dough.
- Precise Pecan Placement: When forming your clusters, ensure pecan halves are of similar size for an aesthetically pleasing arrangement. This attention to detail enhances the visual appeal of your chocolate turtles.
- Temperature Control: When melting chocolate, use a double-boiler or microwave in short 10-second bursts, stirring thoroughly between each interval. This prevents overheating, ensuring a smooth and glossy chocolate coating.
- Parchment Paper Magic: Line your baking sheet not just for easy cleanup but also for smooth removal of your chocolate turtles. This prevents any sticky situations and keeps your candies looking flawless.
Variations and Substitutions: Tailoring to Your Taste
- Nutty Adventures: Experiment with different nut butters, such as almond or cashew, to add unique flavors and textures to your chocolate turtles.
- Chocolate Exploration: Try using various types of dairy-free chocolate chips, each bringing its own character to the recipe. The choice between semi-sweet, dark, or even white chocolate allows for endless possibilities.
- Sweetener Swaps: Explore alternative sweeteners like agave syrup, date syrup, or even a hint of maple-flavored stevia for a personalized touch.
- Customized Coating: Dust the chocolate-coated turtles with finely chopped nuts or a sprinkle of edible gold dust for an extra touch of elegance.
Serving Suggestions:
- Room Temperature Indulgence: Allow your homemade chocolate turtles to come to room temperature before serving. This enhances the flavors and ensures a delightful blend of creamy, nutty, and chocolaty goodness in every bite.
- Dessert Platter Perfection: Arrange your vegan chocolate turtles on a dessert platter alongside other sweet treats. The combination of flavors and textures makes them a standout addition to any dessert spread.
- Tea or Coffee Companion: Pair these decadent candies with some Peppermint Hot Chocolate, or your favorite tea, coffee or festive drink for a delightful afternoon treat. The contrast of sweet and salty flavors complements a warm beverage perfectly.
- Gift-Worthy Goodness: Package your healthy chocolate turtles in our Christmas Cookie Boxes or a decorative box or tin for a thoughtful and delicious homemade gift. Tie it with a festive ribbon for an extra touch of charm.
Storage, Freezer, and Make-Ahead Tips:
- Refrigeration Wisdom: Store your chocolate turtles in an airtight container in the refrigerator. This preserves their freshness, and the chilled temperature adds a delightful snap to the chocolate coating. They stay delicious for up to two weeks.
- Freezing for Future Delights: Layer your turtles between parchment paper in a sealed container before placing them in the freezer. This method ensures they remain just as scrumptious for up to three months. Thaw in the refrigerator for a gradual return to their original glory.
- Make-Ahead Convenience: Prepare the nut butter mixture in advance and refrigerate until ready to shape and assemble. This allows you to streamline the process, making it perfect for busy days or planning ahead for special occasions.
- Preserving Chocolate Brilliance: To maintain the sheen of the chocolate coating, store your turtles in a single layer or with parchment paper between layers. This prevents any smudging or loss of the glossy finish.
Frequently Asked Questions (FAQs)
Q1: When were chocolate turtles invented?
A1: Johnson’s Candy which later became DeMets Candy Company made the first “Turtles” back in 1918. These turtle chocolates were made of pecan pieces that were coated in caramel and then covered in melted chocolate.
Q2: Why are they called turtles?
A2: This homemade candy got its name because they actually looked like turtles with a large, chocolate covered shell.
Q3: Can I use different nuts for these chocolate turtles?
A3: Absolutely! While pecans provide a classic flavor, feel free to experiment with almonds, cashews, or a mix of your favorite nuts for a unique twist.
Q4: Can I use regular honey instead of vegan honey?
A4: Yes, you can substitute regular honey for vegan honey if you’re not following a strict plant-based / vegan diet. The choice of sweetener is flexible, so use what suits your dietary preferences.
Q5: How do I prevent the chocolate from melting at room temperature?
A5: To maintain the chocolate coating’s integrity, store the turtles in a cool place, away from direct sunlight. If serving outdoors, consider keeping them in a chilled container until ready to enjoy.
Q6: How long do these chocolate pecan turtles stay fresh?
A6: When stored in an airtight container in the refrigerator, these chocolate turtles stay fresh for up to two weeks. For longer storage, follow the freezer instructions for up to three months.
Q7: Can I customize the size of the turtles?
A7: Certainly! Adjust the size of the nut butter discs and pecan clusters to your preference. Larger discs make for a heartier treat, while smaller ones are perfect for bite-sized indulgence.
Q8: What’s the significance of Maldon flake sea salt?
A8: Maldon flake sea salt adds a gourmet touch, enhancing the sweet and savory contrast. If unavailable, any flaky sea salt can be used as a substitute.
Q9: Can I gift these chocolate turtles?
A9: Absolutely! Package them in a decorative box or tin, tie it with a ribbon, and you have a homemade, heartfelt gift that’s sure to be appreciated.
Q10: Can I use white chocolate for coating?
A10: Certainly! White chocolate adds a different flavor dimension. Experiment with different chocolate varieties to find your favorite combination.
Q11: Can I make these chocolate turtles ahead and freeze them for a longer shelf life?
A11: Absolutely! These turtles freeze beautifully. Follow the provided freezer instructions, and you’ll have a delightful treat on hand whenever your sweet tooth calls.
Q12: Is there a low-carb option for these chocolate turtles?
A12: Yes, for a low-carb or sugar-free version, opt for sugar-free syrup alternatives like Lakanto or yacon syrup. You can also reduce the coconut oil in the recipe for a lower-carb option.
More healthy chocolate recipes you will love:
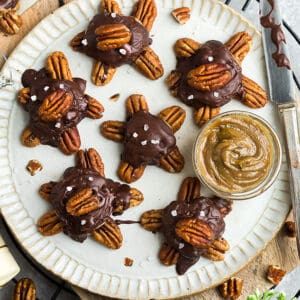
These homemade Chocolate Turtle Candies feature roasted pecans, creamy pecan butter, pure maple syrup, and dairy-free chocolate chips for a delectable treat that's both easy and delightful. Satisfy your sweet tooth with these classic candies for the perfect wholesome holiday treat!
- 60 roasted pecan halves , plus more for garnish if desired
- 15 smaller pecan pieces for the head
- 1/2 cup creamy pecan butter , you can also sub with cashew butter, sunflower seed butter or any nut butter or seed butter of your choice
- 1/3 cup pure maple syrup , you can also sub with any sticky liquid sweetener of your choice such as vegan honey, date syrup etc. Opt for Lakanto sugar-free syrup, yacon syrup or allulose for a low carb / lower sugar option and lower the coconut oil to 2 tablespoons instead.
- ¼ cup melted coconut oil (refined for a neutral taste), , you can also use avocado oil or any neutral oil of your choice
- 2 tsp vanilla extract
- 1/2 tsp ground cinnamon
- 1/3 cup dairy-free chocolate chips or preferred chocolate chips, we like Pascha's Chocolate, Hu's Kitchen Gems, Lily's Sweets.
- 1 tablespoon coconut oil (refined for a neutral taste), , you can also use avocado oil or any neutral oil of your choice
- Maldon flake sea salt for garnish
- Line a baking sheet with parchment parchment paper.
- Place 4 pecan halves around the same size and arrange them into clusters. Use one smaller pecan piece for the head.
- Combine the nut butter with maple syrup, melted coconut oil, vanilla extract and ground cinnamon and mix until smooth. Cover the bowl and place in the fridge for at least an hour. You want the texture to be similar to a thick caramel paste or cookie dough.
- Once ready, use clean hands to shape into 2/3 Tbsp-sized discs and place on top of pecan clusters.
- Melt the chocolate and oil in a double-boiler over the stove or in a heat-safe bowl in the microwave in 10 second increments, stirring well in between. Spoon a small amount of chocolate on top of each turtle. Add a sprinkle of sea salt & garnish with one single pecan, if desired. Allow the chocolate to set up – you can place the pan in the fridge or freezer to speed things up.
Recipe Video
How to store:
Refrigeration: Store your chocolate turtles in an airtight container in the refrigerator for up to two weeks.
Freezing: Layer your turtles between parchment paper in a sealed container before placing them in the freezer for up to three months. Thaw in the refrigerator for a gradual return to their original glory.
Make-Ahead Convenience: Prepare the nut butter mixture in advance and refrigerate until ready to shape and assemble. This allows you to streamline the process, making it perfect for busy days or planning ahead for special occasions.
Preserving Chocolate Brilliance: To maintain the sheen of the chocolate coating, store your turtles in a single layer or with parchment paper between layers. This prevents any smudging or loss of the glossy finish.

 Did you try this recipe?


Leave a Comment